New Lab, Who Dis?


(or, "Ryan's misadventures in 3d printing)
Spring is in the air. The birds are chirping, the bees are buzzing, the sweet fragrance of citrus blossoms wafts heavily on the Arizona breeze - and I have to take Claritin regularly lest I suffer the consequences of watery eyes and sneezing fits. As the new season rolls in, it's also time for Spring cleaning; time to finally organize that closet downstairs. Time to go through the pantry and donate all those canned goods I'll never use to the local food bank. Time to knock out all those outdoor projects I've been putting off all Winter, before the heat of Phoenix in summer is upon us.
Spring is a time of renewal; a time to take stock of what you have, a time to get rid of things you don't need. It's time to clean up and get your shit together. I'm not really sure when I decided "enough is enough", but some time after my latest blog post I decided I couldn't stand looking at the lab gore anymore and it was time to do something about it. It's a new season and it's high time for a refresh to my messy homelab.
Spring Cleaning
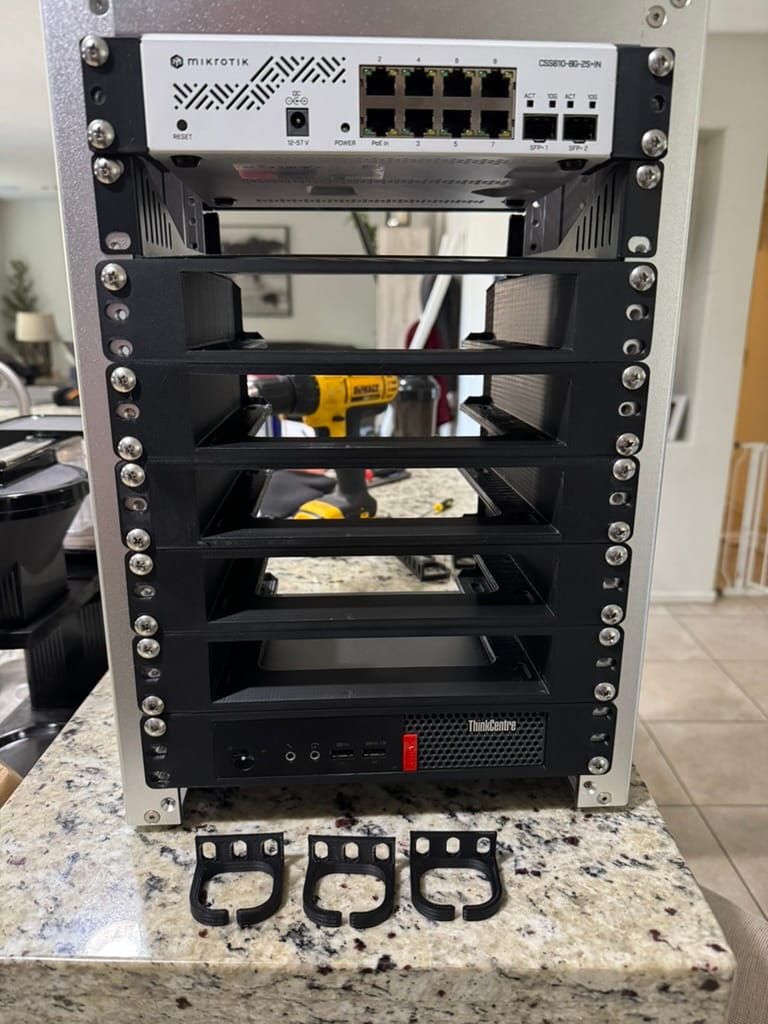
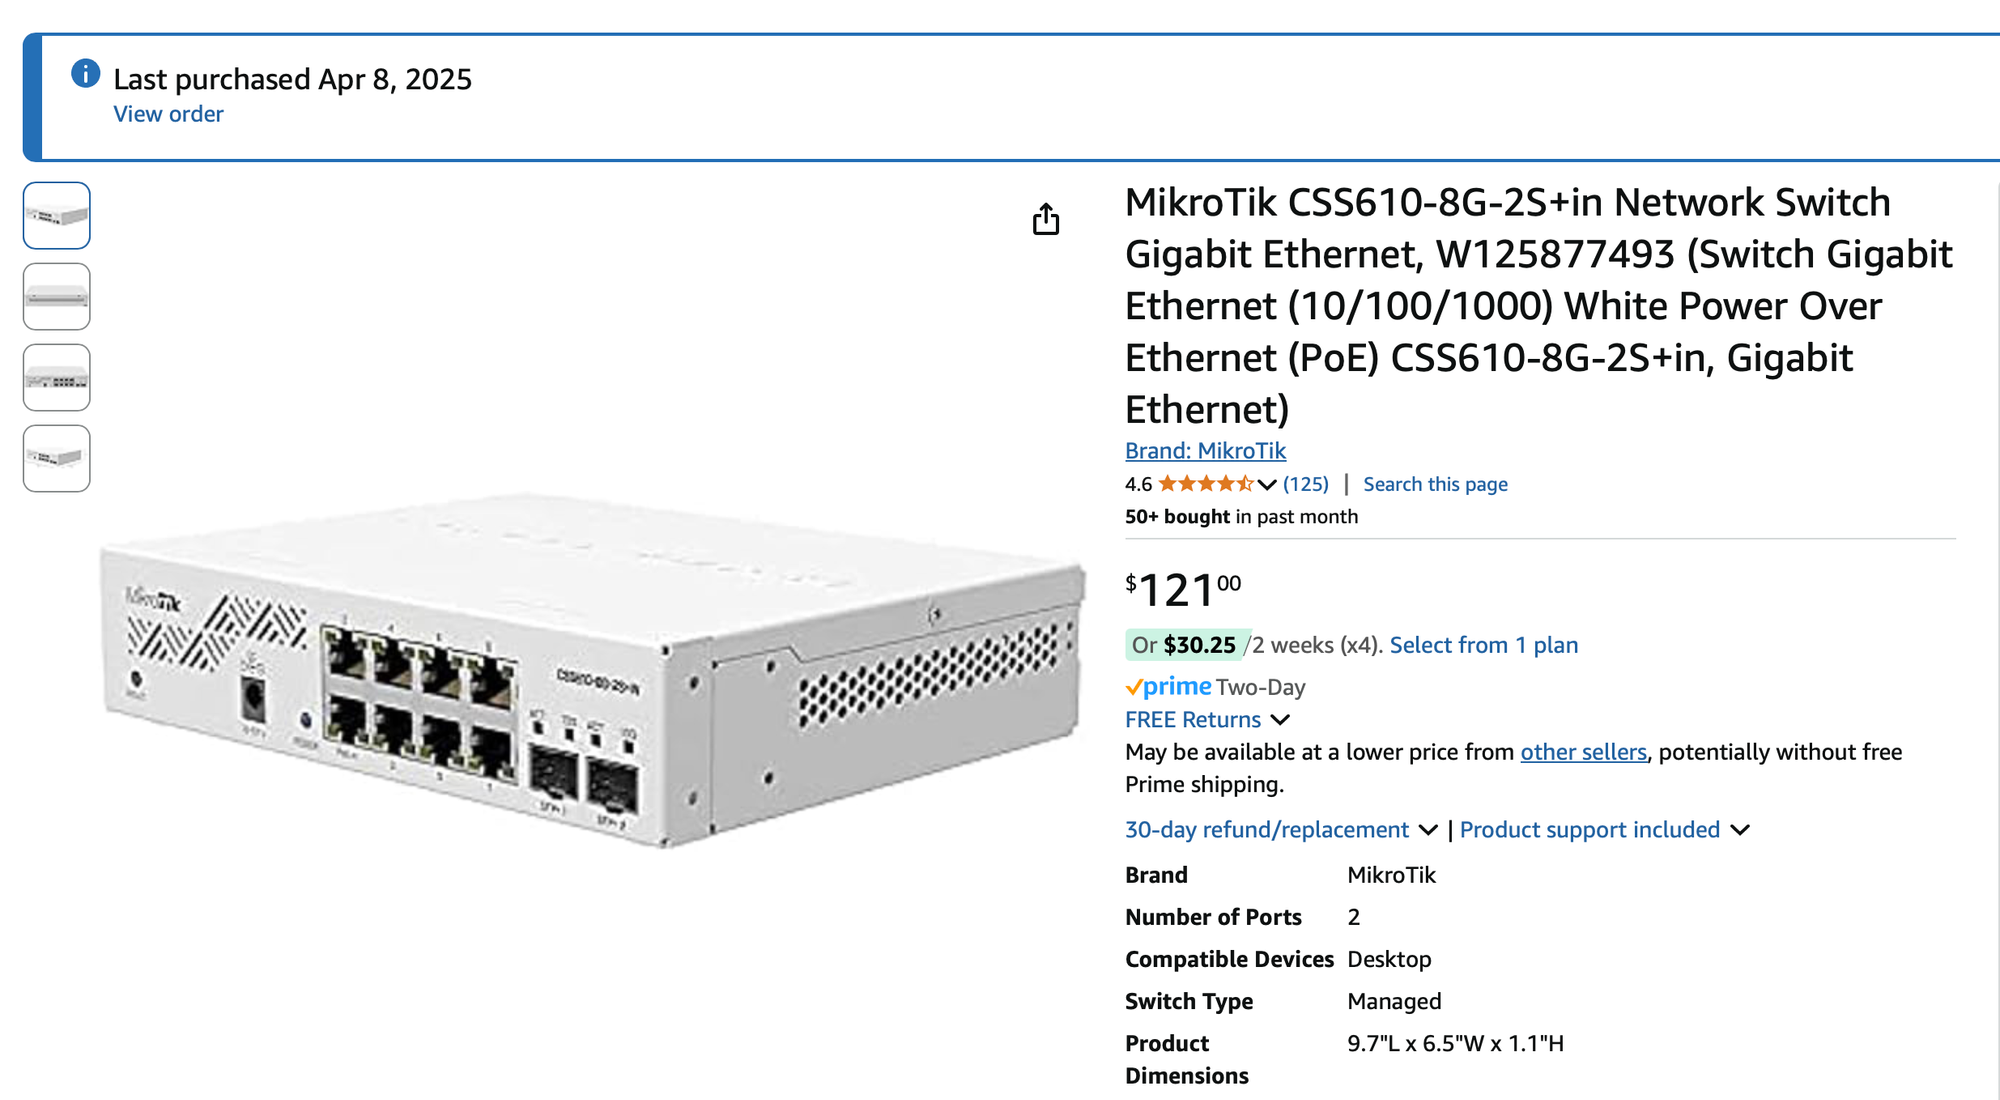
Okay, so it's not a "new" lab. It's the exact same hardware I've been running for the past couple years, give or take a few odds and ends; not the least of which being my new MikroTik switch. Unfortunately, the 16 port switch I was running is 13" wide and won't fit, so I pulled the trigger on a Mikrotik CSS610-8G-2S+, which is only about 9" wide and fits nicely in the new 10" rack I purchased to house my lab. I bought a GeekPi T1 for my lab, which has 8U of vertical space - which is just enough to host my lab (kind of wishing I'd sprung for the T2, but that's another story...). 10" or 'half-sized' racks are becoming more and more popular for home labbers looking to take advantage of some of the benefits of a server rack, but without the footprint of a full size 19" standard rack.
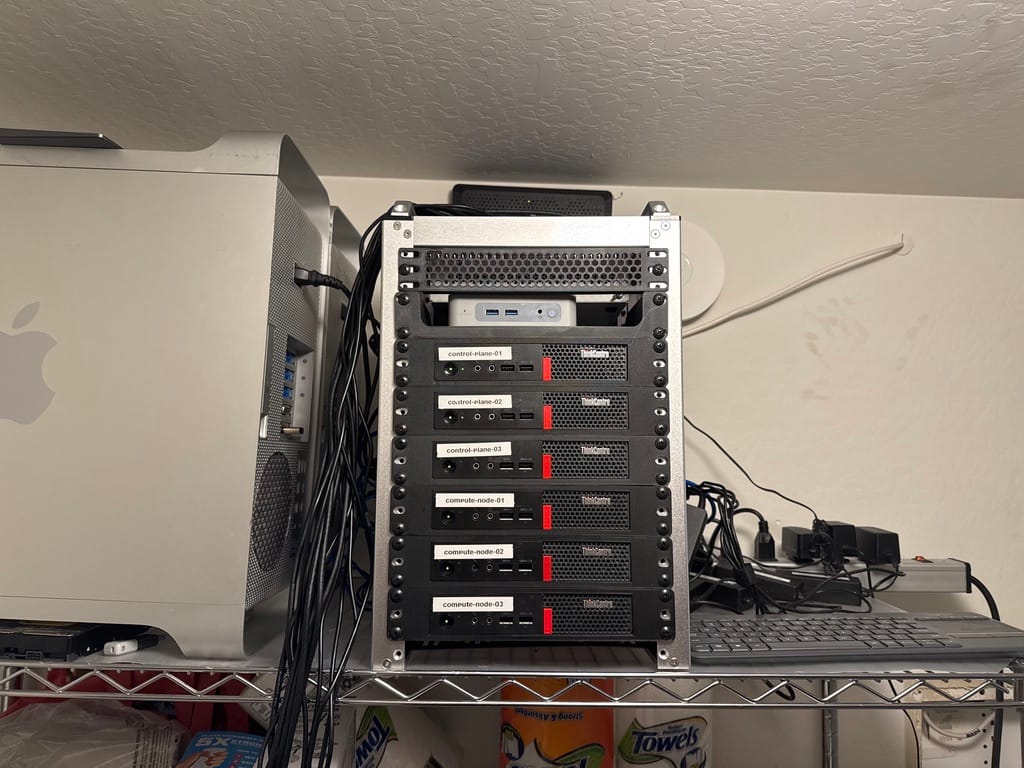
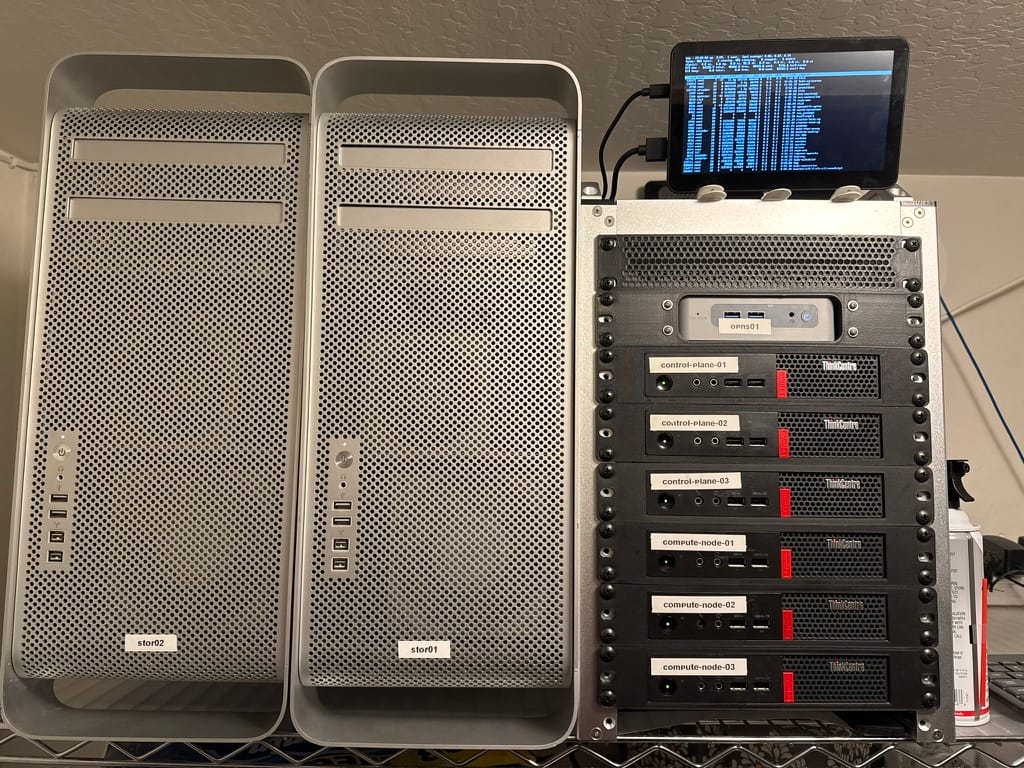
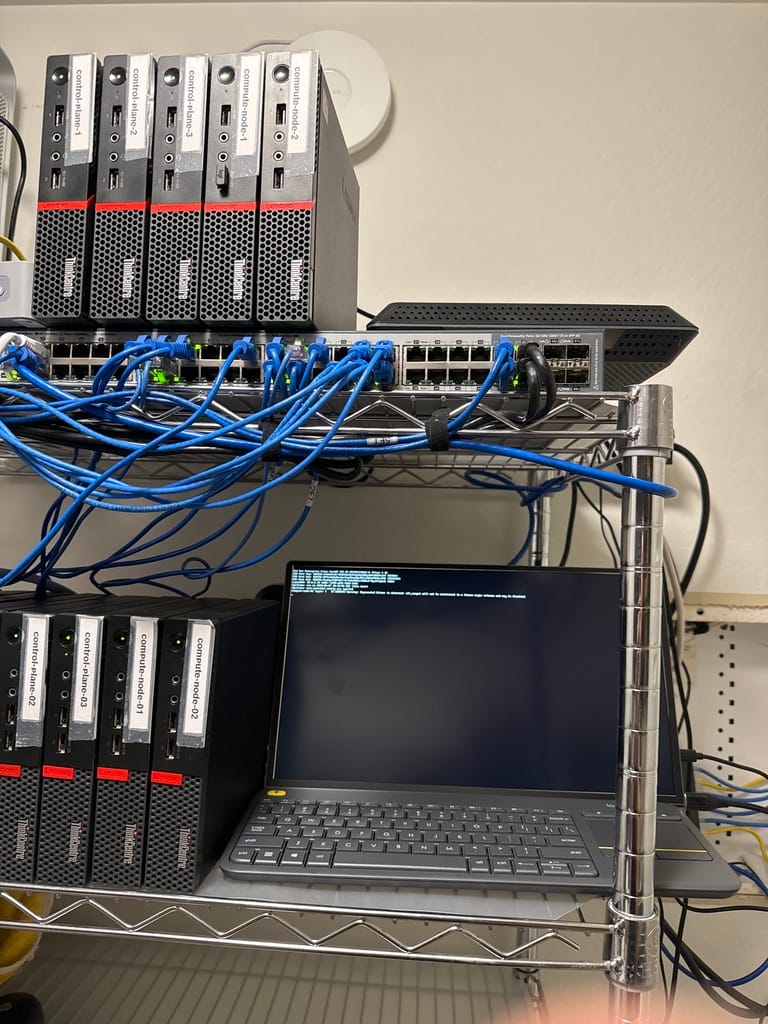
As it's name might suggest, the GeekPi rack is aimed primarily at Raspberry Pis and similar SBCs, and even comes with shelves pre-drilled with mounting holes for the credit card sized computers. However, a quick search on YouTube and you'll find plenty of content from users building out impressive home labs on the platform using an array of Intel NUC clones and TMM (Project: Tiny/Mini/Micro) machines, like I run. I have a 6 node Openshift cluster of Lenovo M710Q Tinys. They have their pros and cons. On the pro side, they are inexpensive, don't consume a lot of power, they don't put out much heat, and except when under heavy CPU load, they run nearly silent. On the con side, they lack any kind of OOB (out of band) or IB (in band) management like Intel vPro, and due to their age, they have no real viable path to adding 10Gbe networking. But they get the job done - with six of them stacked together in a cluster, I have a pool of 40c/80t @3.8Ghz, 640Gb of RAM and 6Tb all flash hyperconverged storage. If I'm being completely honest, my home lab is actually larger than some of my customers' production clusters, and that is something to think about. The biggest bottleneck in my environment is the 1Gbe network limitation, but for the purpose of running the handful of services I self host, it's more than adequate. However, all those little nodes need a lot of cables; power, ethernet, HDMI, USB... it all adds up pretty quickly and becomes a tangled mess of cables if you let it - which, I did.
From time to time I've made some halfhearted attempts to tame the spaghetti monster behind my lab with velcro cable ties and cable sleeves, but never made any serious effort. The fact is, most cables are not designed with home lab use in mind, so they typically come in sizes of 6' or more. With a few dozen meters-long cables sticking out of the back of my lab, it just became an impossible mess to deal with.
I've found that if you want short cables (2' or shorter) you're typically going to pay a premium. It seems kind of counterintuitive to pay more money for less cable, but it is what it is. You want neat and tidy, you're going to have to shell out a little extra cash. Either that, or just deal with the tangled bramble of cables (like I did for years). Eventually, I got fed up with the mess and decided to get my lab right, once and for all.
One of the downsides (depending on how you look at it) of going this route is that you basically have to 3d print a bunch of custom pieces because none of the consumer grade hardware I run was ever intended to be rack mounted (save for the new network switch), and despite the rising popularity of these 10" racks, the half-size rack form factor is not an officially recognized standard (yet). Luckily, I already had a 3d printer at home - a Creality Ender 3 V3 Se. It's not the best printer in the world, but it is a solid and relatively inexpensive choice if you're just getting started with 3d printing. When it comes to 3d printing, I would consider myself somewhere between "seasoned novice" and "just experienced enough to be dangerous". I learned a little AutoCAD in high school, used to dabble with creating 3d models on Sketchup (back when it was still a Google product), and I understand the basics of how to set up and calibrate a 3d printer to reliably produce decent quality prints.
Sure, you could always just buy some prefab generic shelves for your mini rack and call it a day. But if you want to take full advantage of the rack mount form factor, you're going to need to print all kinds of custom brackets and shelves to hold your compute nodes safe and secure. If you choose to go this route, one of the first things you're going to hear from the "experts" online is to not use PLA filament because the weight and heat can warp and sag your prints. Personally, I think this is seriously overblown. These Tiny Lenovos weigh less than a pound and don't put out all that much heat - certainly not the 200+°C it takes to melt PLA filament. PLA is strong, durable and a lot easier to work with than stronger filaments like ABS, and it won't make your house smell like burning plastic. I say just go with what works.
In the end, I discovered that the prefab metal shelves that came with my GeekPi rack would not work with the 3d printed pieces, so I ended up having to print literally single piece in my rack.
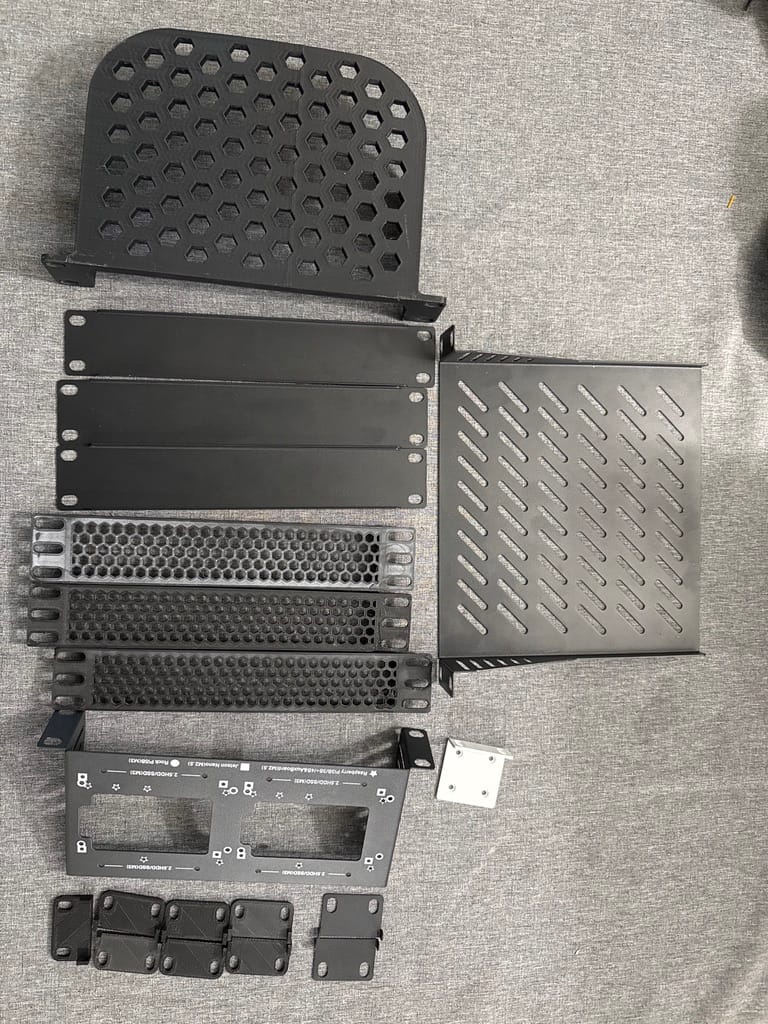
In total, I had to print (and reprint):
- 6 Lenovo Tiny 10" x 1U brackets
- 12 cable management loops
- 1 vented half depth shelf
- 1 custom Beelink E14 1U bracket
- 2 vented blank off plates
- rack ears for my new Mikrotik switch
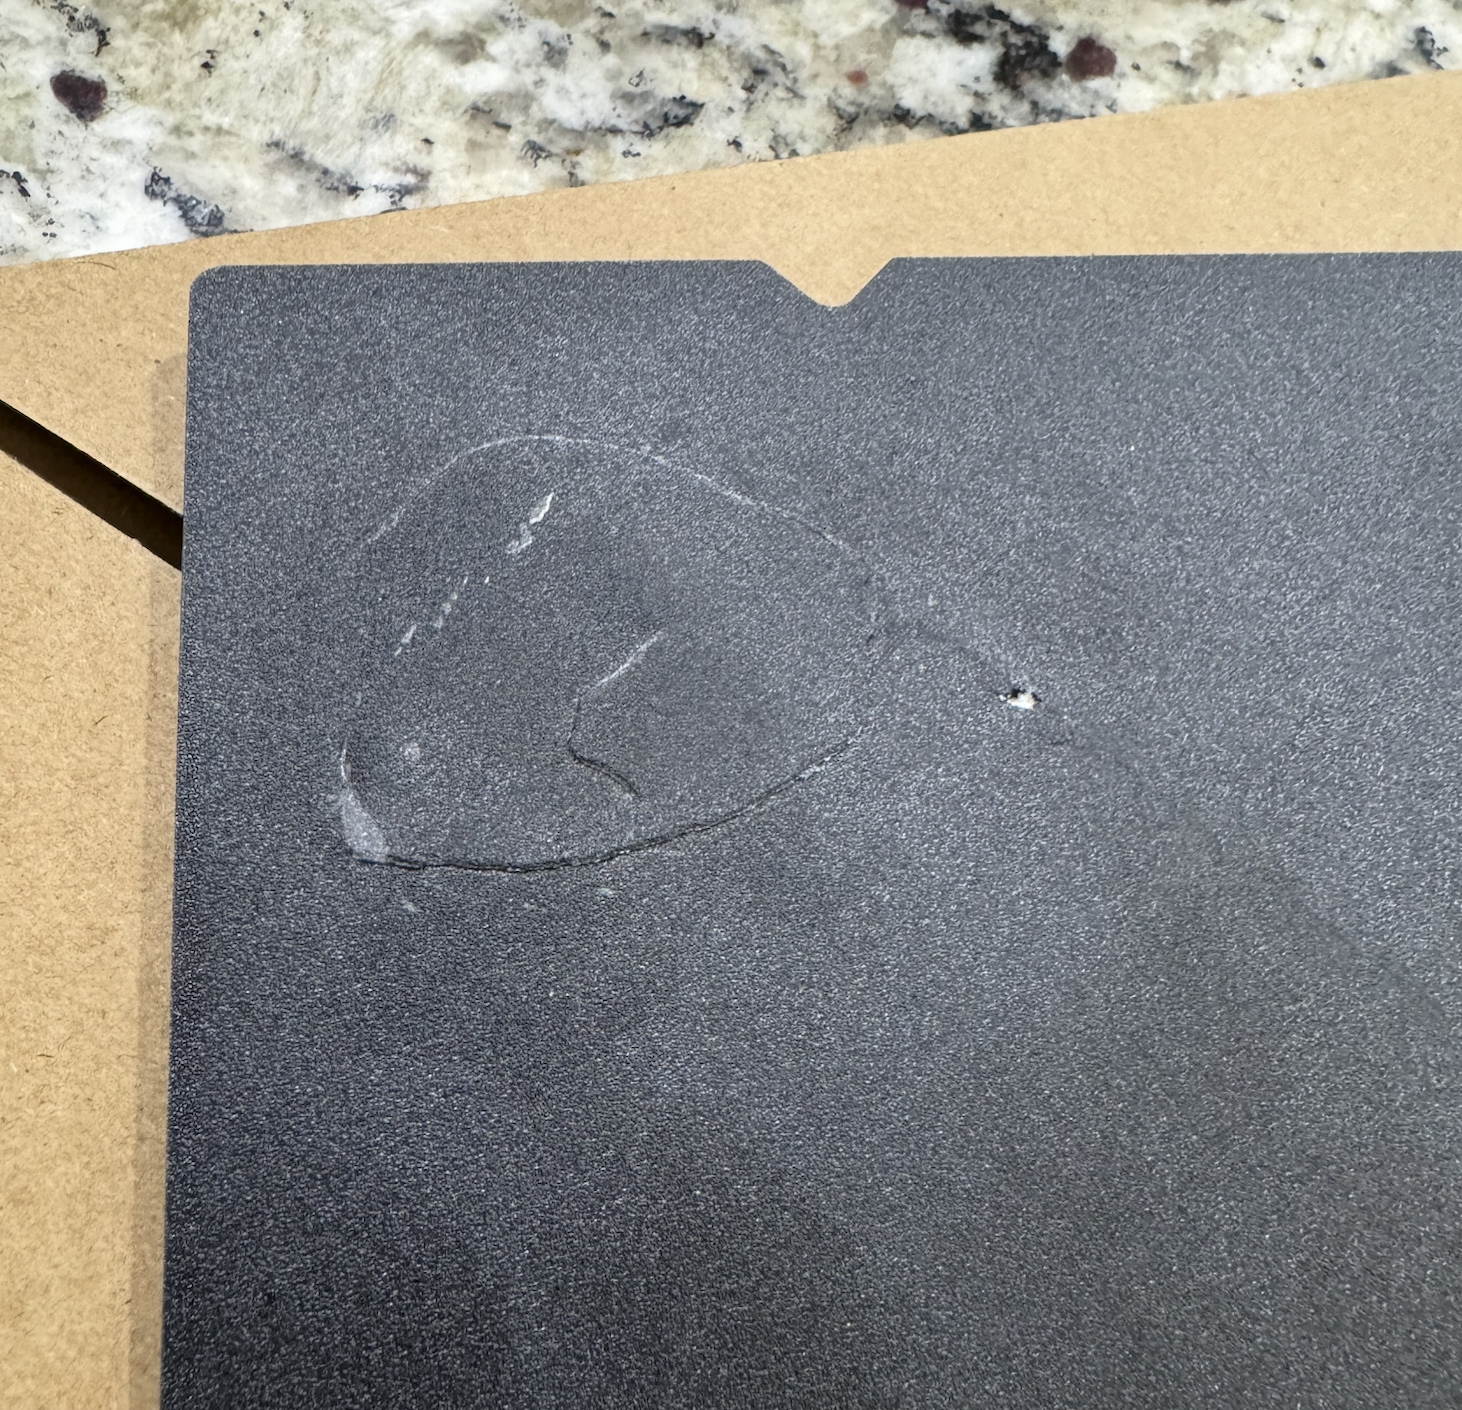
It took me about 5 days of printing round the clock to produce all the pieces I needed. I ran into a few snags along the way that slowed down progress. The build plate on the printer at home had already been in use for over a year and I had issues with prints sticking to it properly, with basically every other print failing to lay down the bottom layer on the first attempt. Once the bed has been leveled and is hot from operating for a while, I have better luck with prints sticking. I've tried various "fixes", like glue stick and hair spray t0 no avail. I ended up buying a new build plate, but then I had the exact opposite problem from the worn plate. The first print I attempted on the new build plate stuck to it so firmly that it literally ripped some of the textured coating off when I tried to remove the print. One Amazon return later and I got my replacement build plate the next day. That build plate must just have been faulty because I've been printing on the new one without issue since.
The bigger pieces with large, flat faces like the brackets for my Lenovos printed without too many issues. What surprised me though, was how much trouble I had with the vented blank-offs. The fine detail of the honeycomb-pattern vents proved to be a little too much for my 3d printer to handle and I had multiple mis-prints before I finally figured out what to do. The fix for these intricate pieces was to raise the model 2mm off of the build plate and to add supports under it. Once I figured that out I was able to reliably print the vented blanks, although I will say that there is a small quality tradeoff by not having the "front" fascia laid down directly on the print bed. That being said, they look good enough. You could of course print them a little thicker and sand them smooth and shoot them with some matte clear acrylic if you want a more professional finish, but I'm pretty happy with the way they all came out.
All in all, it took all week Monday-Friday to print all the pieces I needed and I went through about a roll and a half of black PLA. I wish I could have sped up the process, but if you've ever used a 3d printer, you are aware that there is a direct, inverse correlation between print speed and quality. I find that on my printer, I tend to get the best results when I reduce print speed to 90% or lower, and bump the temperature up to the maximums for the filament - in this case 210°C for the nozzle and 65°C for the print bed. I'm pretty pleased with the way that all the prints came out. They may not be perfect, but it's a massive improvement over the mess of computers and cables strewn all over my utility room shelf.
The great thing (and downside) about 3d printing your own brackets is that you when you can design your own parts, you have total control over how you manage the space in your rack. For my Lenovo nodes, I was able to find a model that was perfect for them on printables. There are actually quite a few to choose from, but I settled on this one https://www.printables.com/model/1040412-lenovo-thinkcentre-tiny-m720qm715qm920q-10-rack-mo
Worth noting, for Lenovo Tinys, this 3d model will accommodate almost every Lenovo Tiny form factor PC ever created. They are all basically the same exact dimensions, and this model has ample room for venthilation for the odd models that have additional vents on top or bottom for things like GPU cards.
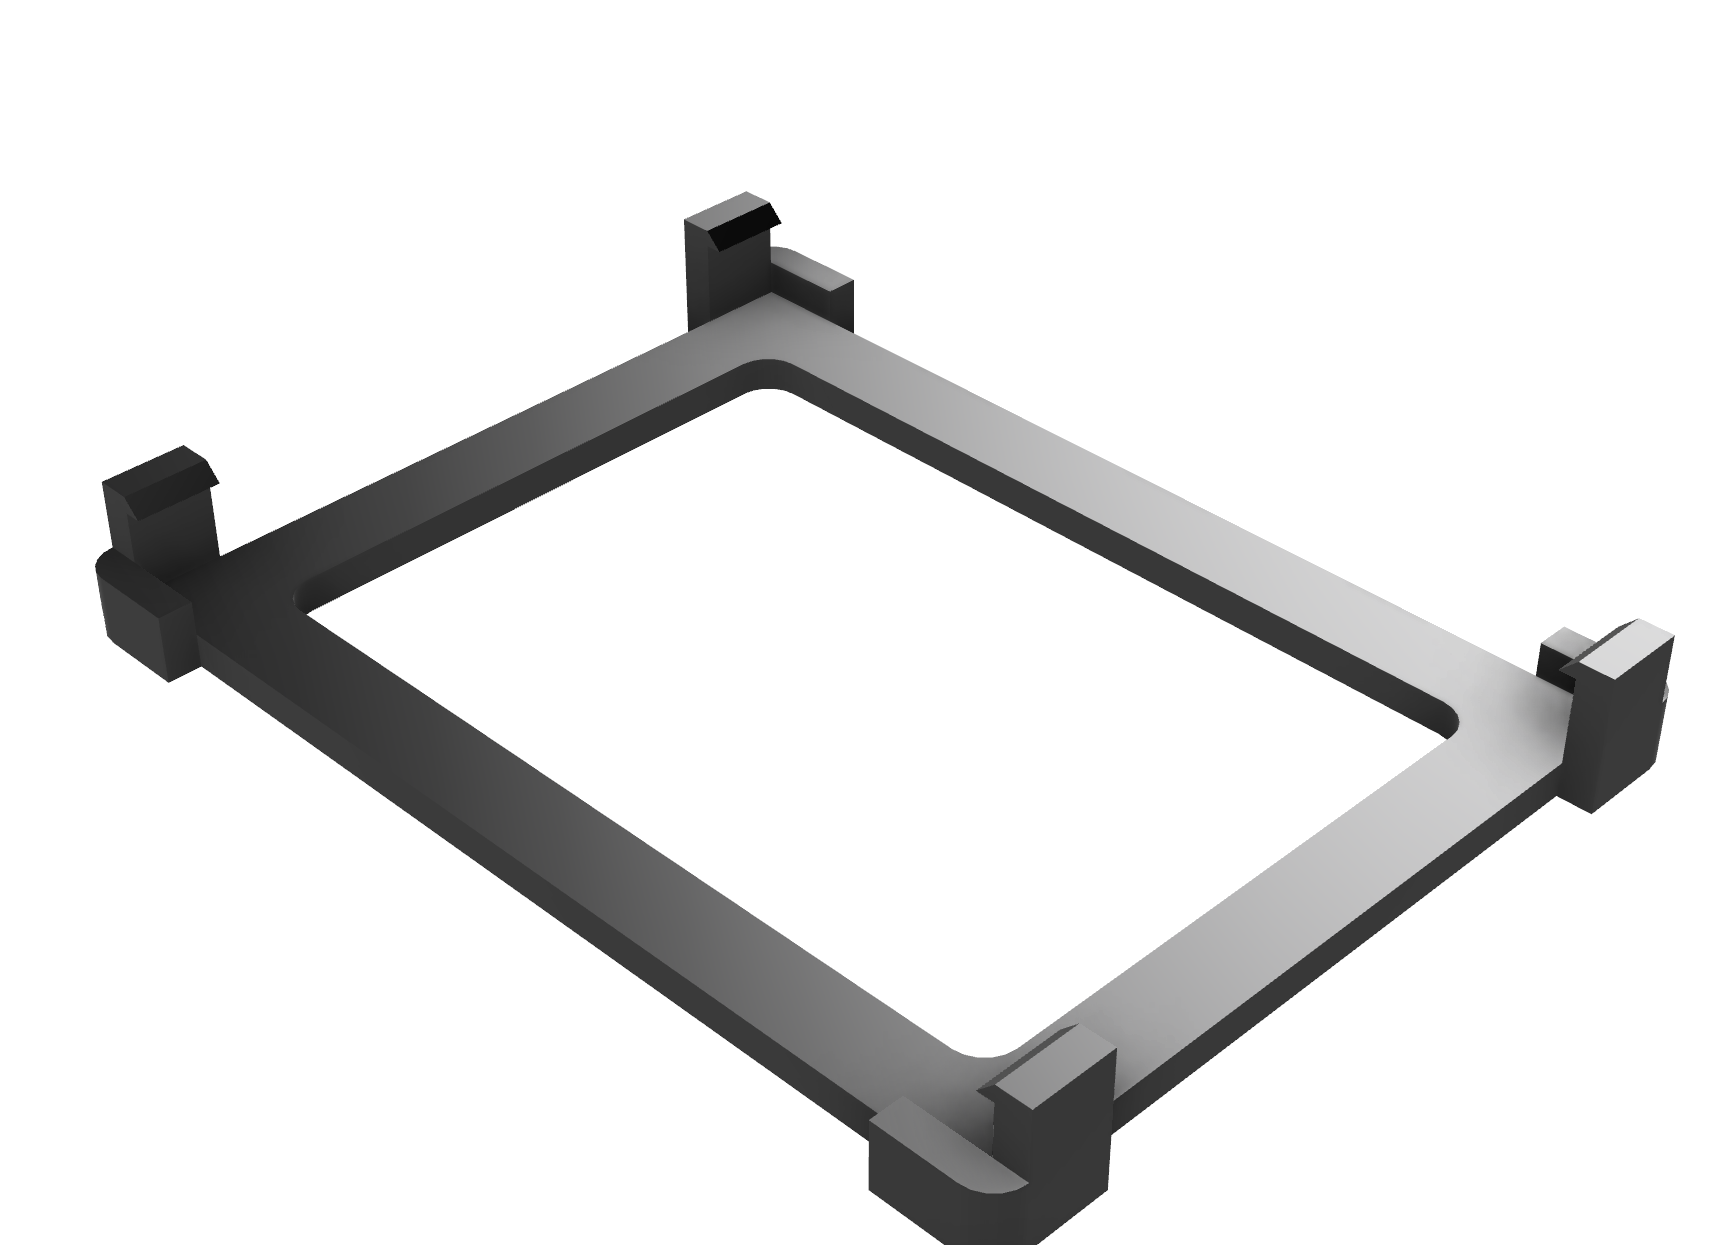
These were by far the largest pieces I had to print, each one taking about 8 hours, but they came out great. Then I had to tackle the new Mikrotik switch. Thankfully, someone also already created a model for the rack ears here https://www.printables.com/model/1235600-modular-10-inch-server-rack-mounts-for-mikrotik-sw/files
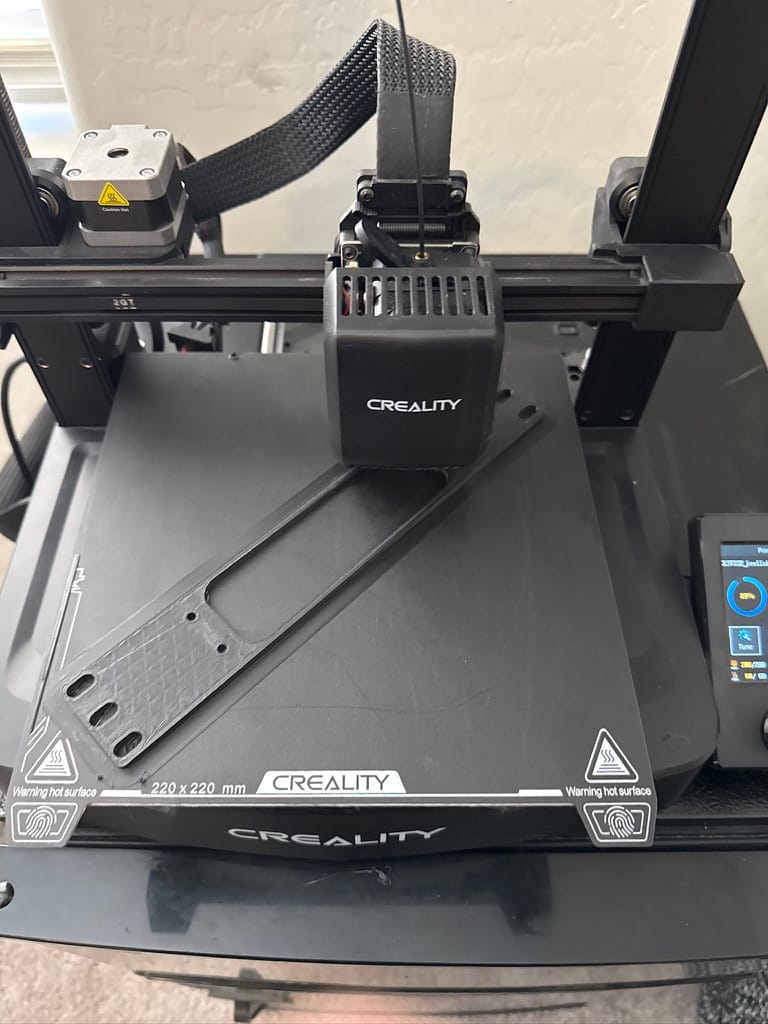
I'm really pleased with how it was coming along. Then came time to tackle the Beelink router, which unfortunately did not have any models ready to go. At first I just printed a generic vented shelf, seen here
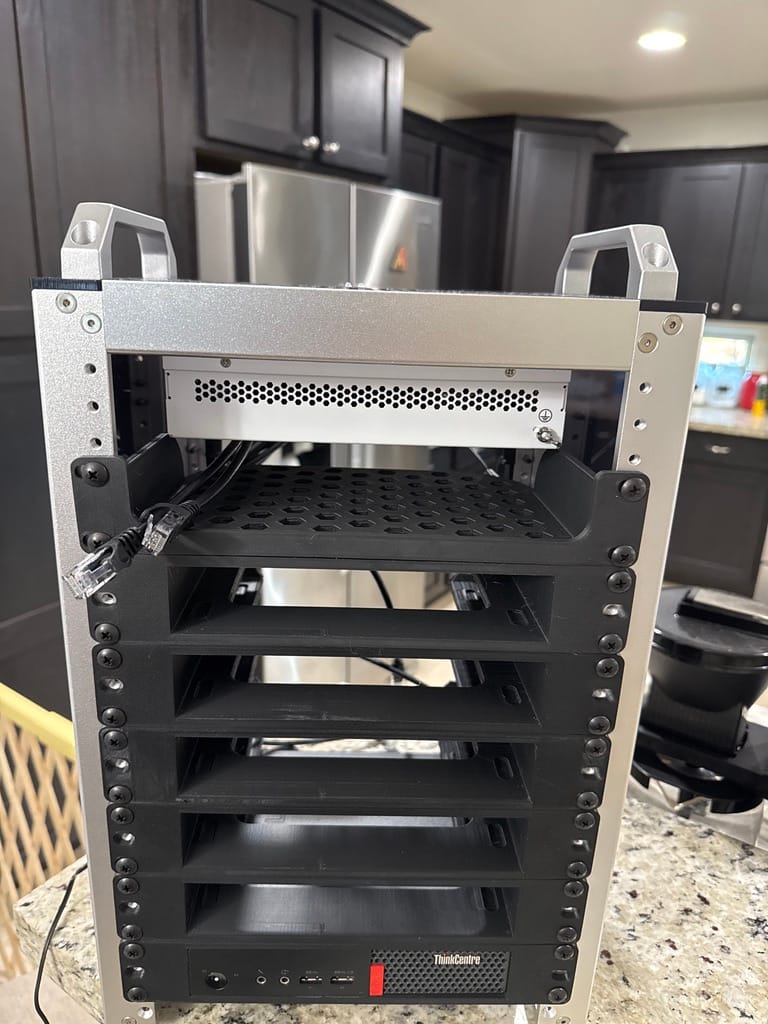
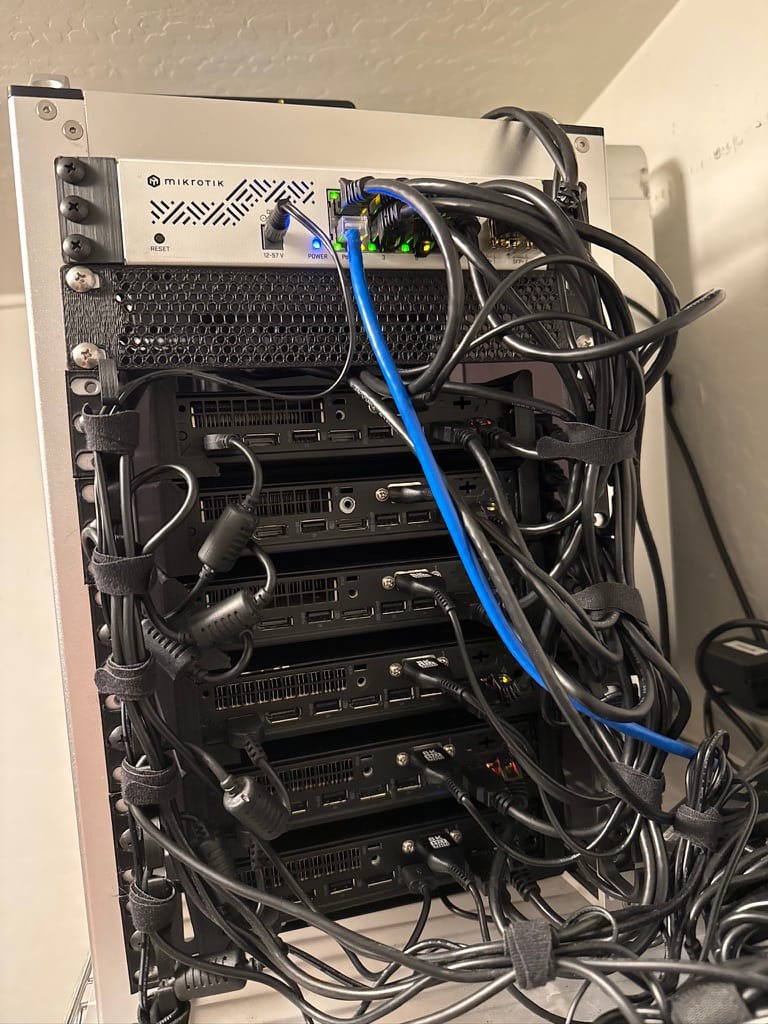
Also, notice that I decided to flip the switch to the back of the rack. With all 8U of the rack fully populated, routing the ethernet cables to the front to a patch panel (which is more or less customary on a lot of these 10" rack builds) was a no-go. I also ended up ordering a big bag of 100 of matte black rack screws because the GeekPi kit didn't come with enough to mount everything, and using a mix of silver and black screws triggered my OCD, so I had to just replace all of them.
Lab gore in the process of being abated (that mess of cables on the left side of the rack are/were the old HDMI and USB cables for the KVM switch - more on that in a bit), my rack was a work in progress for quite a while as I waffled over how to handle racking the Beelink router. Logically, just putting it on a shelf would have been fine. It's not like it's going anywhere. But I wasn't satisfied with it just being loose when everything else is held securely in place with custom brackets.
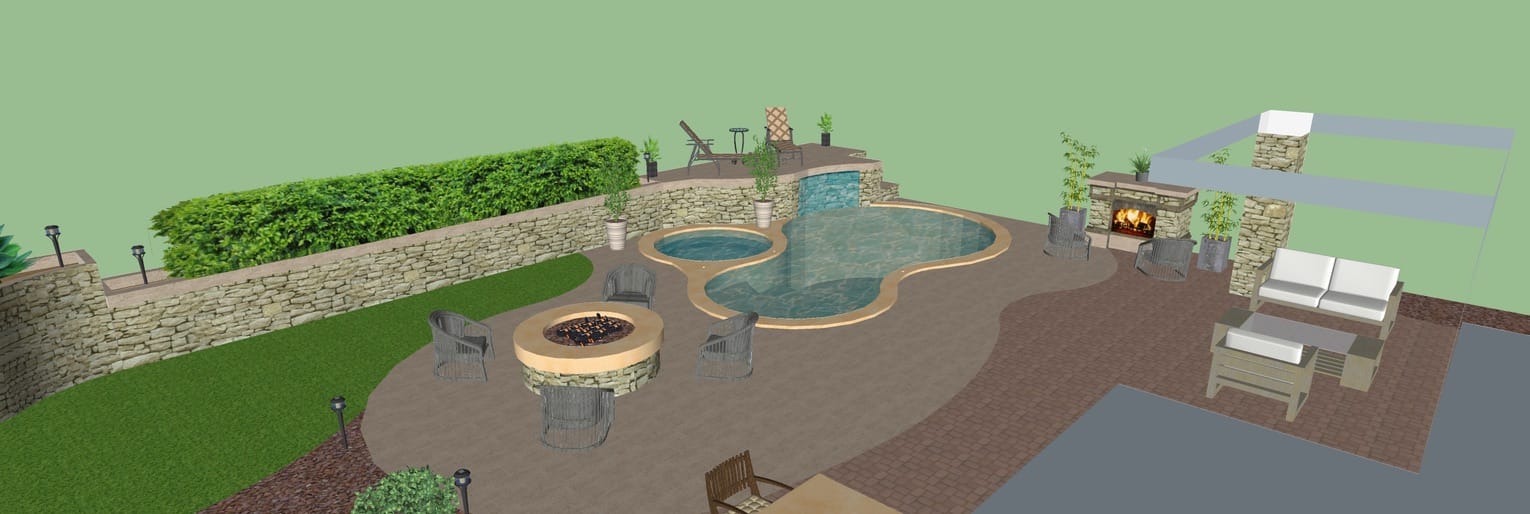
Unfortunately, since no ready to print models existed for the Beelink E14 I ended up having to design one myself, which turned into a whole rabbit hole in and of itself. Back in the day, I used to use Sketchup for 3d modeling, back when it was still a Google product and I loved it. I used it for designing things like wood working projects and I even designed the pool and hot tub in the back yard at my old house!
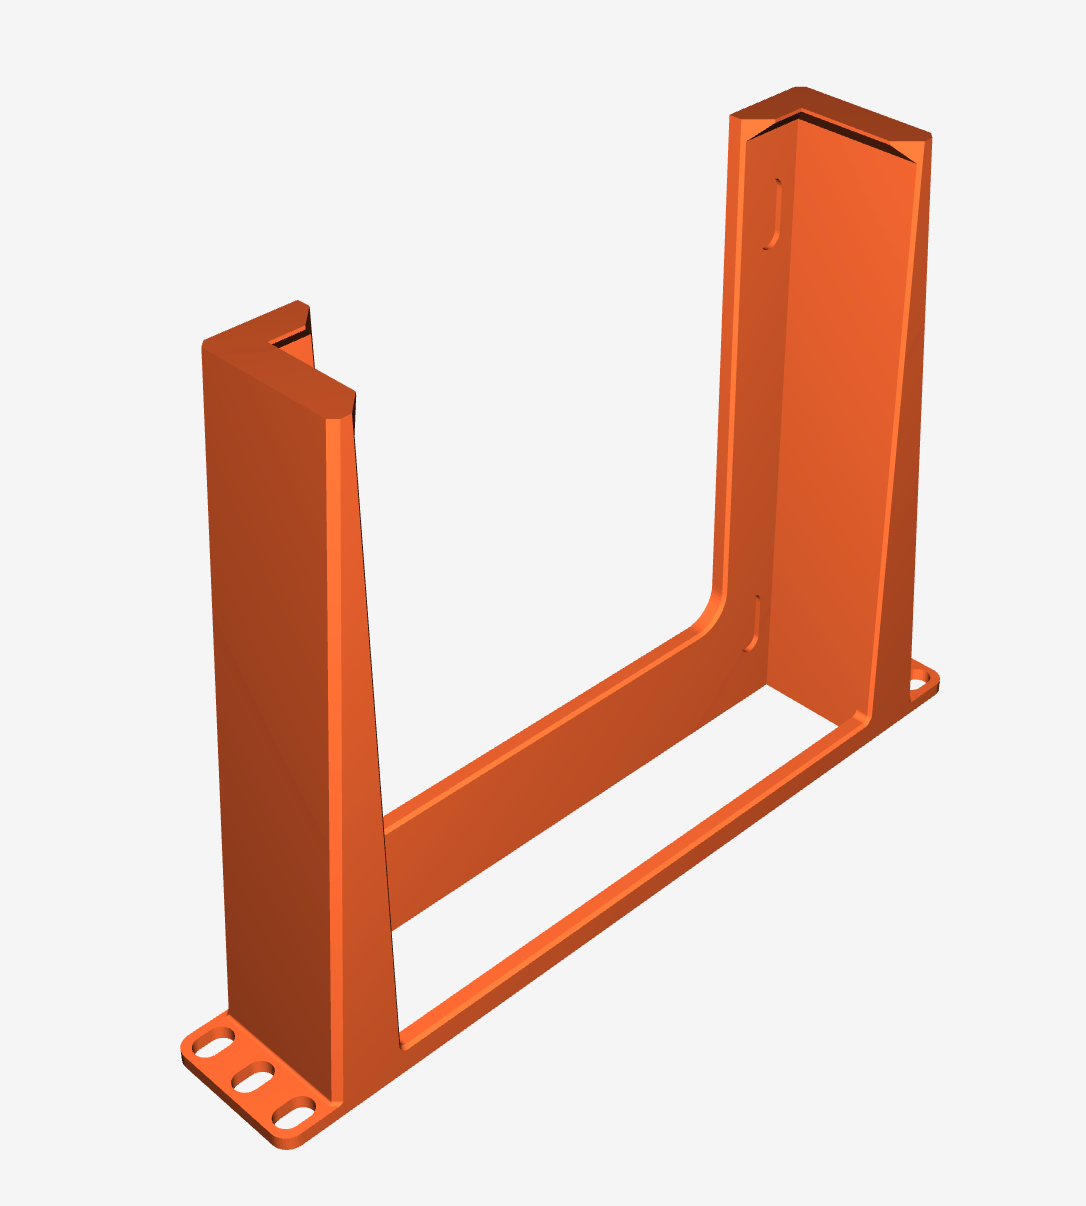
Unfortunately, these days Sketchup no longer honors the perpetual license I bought back then, and I wasn't about to shell out $300 a year for a subscription to an app that I wasn't even sure was going to do what I needed (turns out it doesn't - at least the 2017 desktop version of the app I still had a copy of on my NAS doesn't export 3d models to anything a 3d printer can use). So back to the drawing board (literally). I asked around and was generally pointed toward either Autodesk Fusion 360 or Onshape - both of which have a free to use option. I opted for F360 because I did not want something that is browser based. That being said, I quickly found out that F360 has a very steep learning curve, and even after watching a bunch of tutorials and kind of getting the hang of it, I keep finding that it has some maddeningly frustrating behaviors and a pretty unintuitive UX. But for the very attractive price of "free", I put up with F360s quirks and forged ahead. Maybe chalk it up to my novice skill level using the app, but I ended up redesigning the mounting bracket for the Beelink router multiple times. Initially I started out with a two piece model bolted together with M3 screws seen here
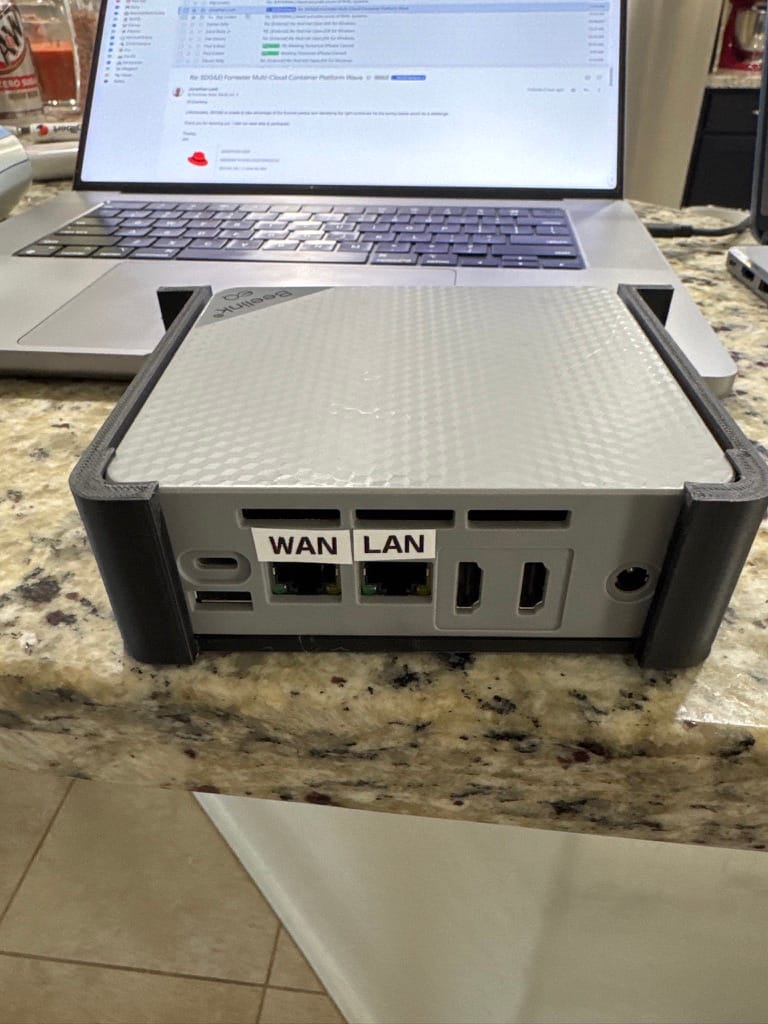
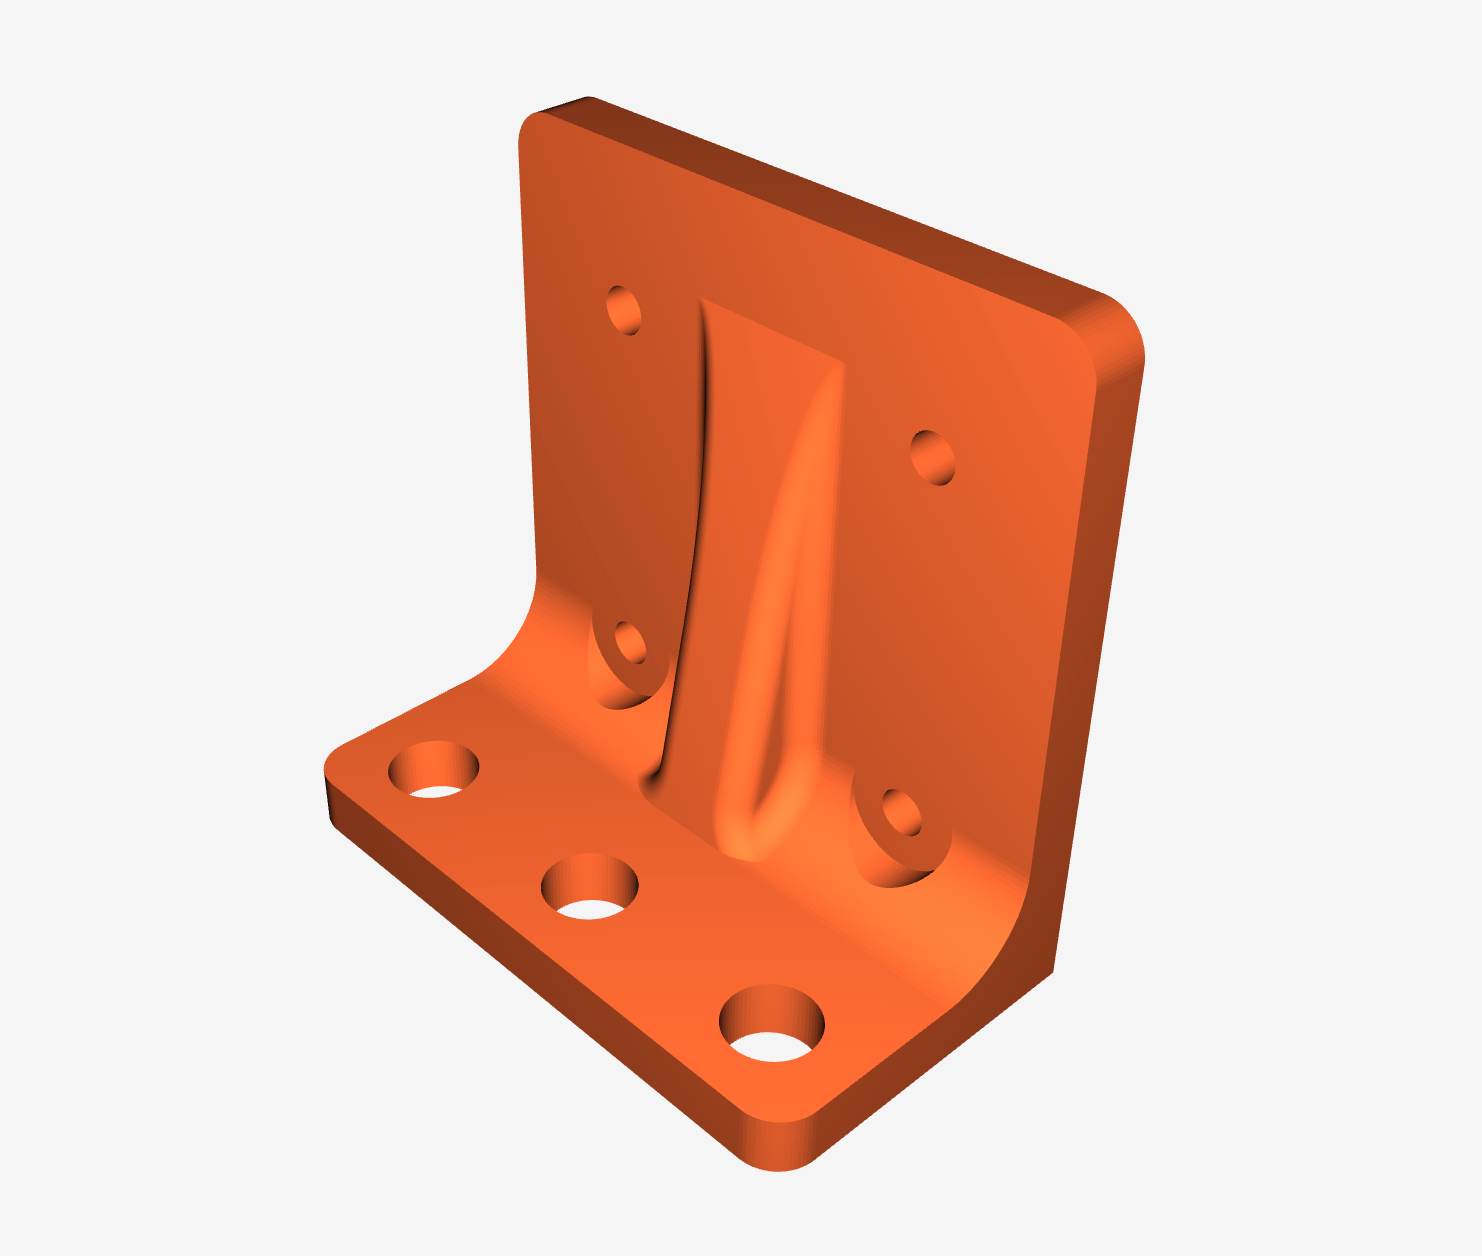
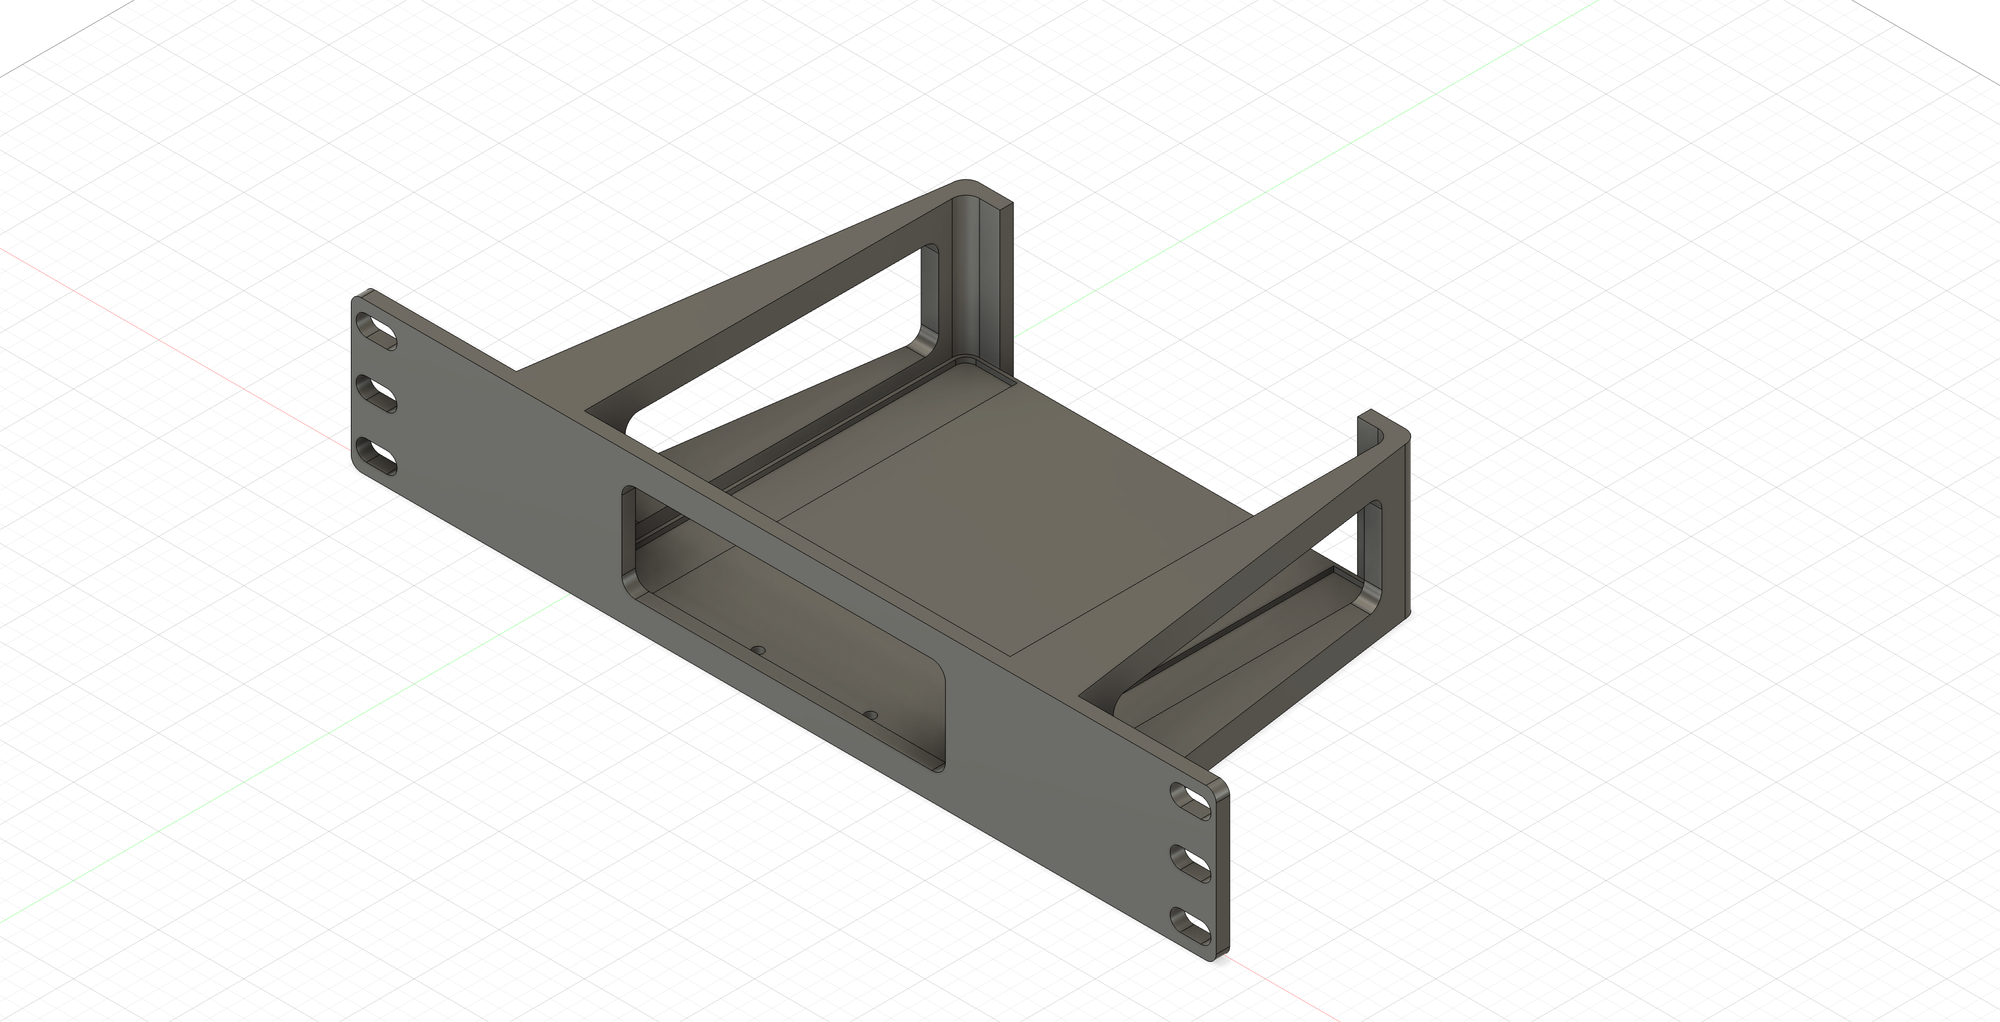
I didn't like the screws in the front face or the gaps on the sides of the router, so I redesigned my model as a single piece, and (after multiple misprints and miscalculated dimensions) I finally landed on the v5 model I'm using now, seen here, which is loosely based on the design of the Lenovo Tiny rack mounts (although it shares absolutely nothing in common with them, this was a model I designed from scratch)
With the router finally sorted out, I moved on to the blank offs. With the switch rear mounted, I needed to do a vented blank for the front facing top 1U of my rack. There are plenty of 3d models out there to pick from and I tried several of them (here are a handful of the candidates that didn't make the cut)
But then I got a wild hair to do something... actually kind of awesome. My lab has always been a bit of an eyesore, and moving it to a rack definitely made it a lot tidier, but what if I took it a step further and made it something I'm actually proud of - a display piece?
The idea dawned on me - my lab has basically always been an Openshift cluster. Even way back when I ran RHV (Red Hat Virtualization - R.I.P.) and before that, vSphere, it's basically always just been a way to run Openshift, going all the way back to the bad old Openshift 3.x days. Why not put the Openshift logo on my rack?
The first hurdle I ran into was the fact that, like Openshift itself - our branding of Openshift changes quite frequently. I did a little spelunking of our official branding guides and could not for the life of me find a usable version of the new (as of 2024) Openshift logo - this one

All I could find were low resolution thumbnails or partial images embedded in Powerpoint presentations and Red Hat videos on Youtube. What I needed was an original, unadulterated SVG image, and unfortunately I just couldn't find one. However, thanks to the wonderful community of very smart and talented people I have the pleasure of working with at Red Hat, a coworker offered to "make" one for me. Shout out to Alejandro Guadarrama who literally whipped up a pixel perfect replica of the new OCP logo in a matter of minutes.
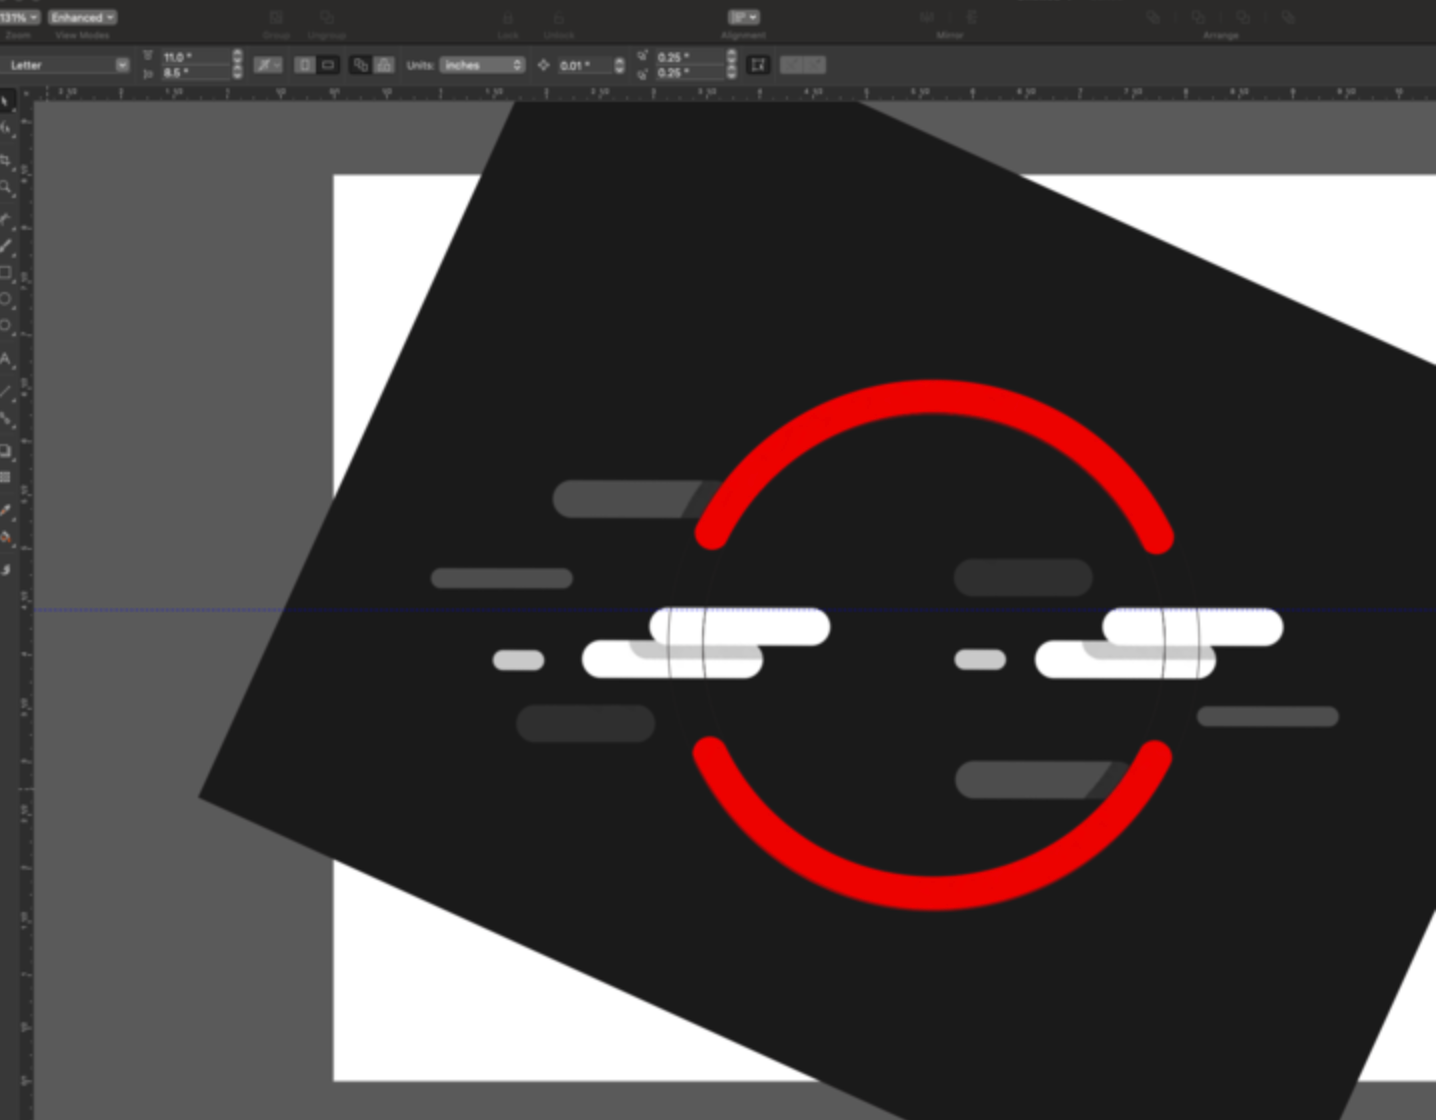
With a fresh SVG in hand, I set out to embed the Openshift logo into my blank off plates.
Not too shabby... I wasn't super jazzed about the simple vertical vents though. Chalk that up to my novice skills at modeling in F360. At first it was just an Openshift logo shaped hole in black plastic, but then I thought "hmm... what if I made the logo red?" After a little tinkering, misprints and learning about how to deal with 3d printer tolerances, I made a model that worked
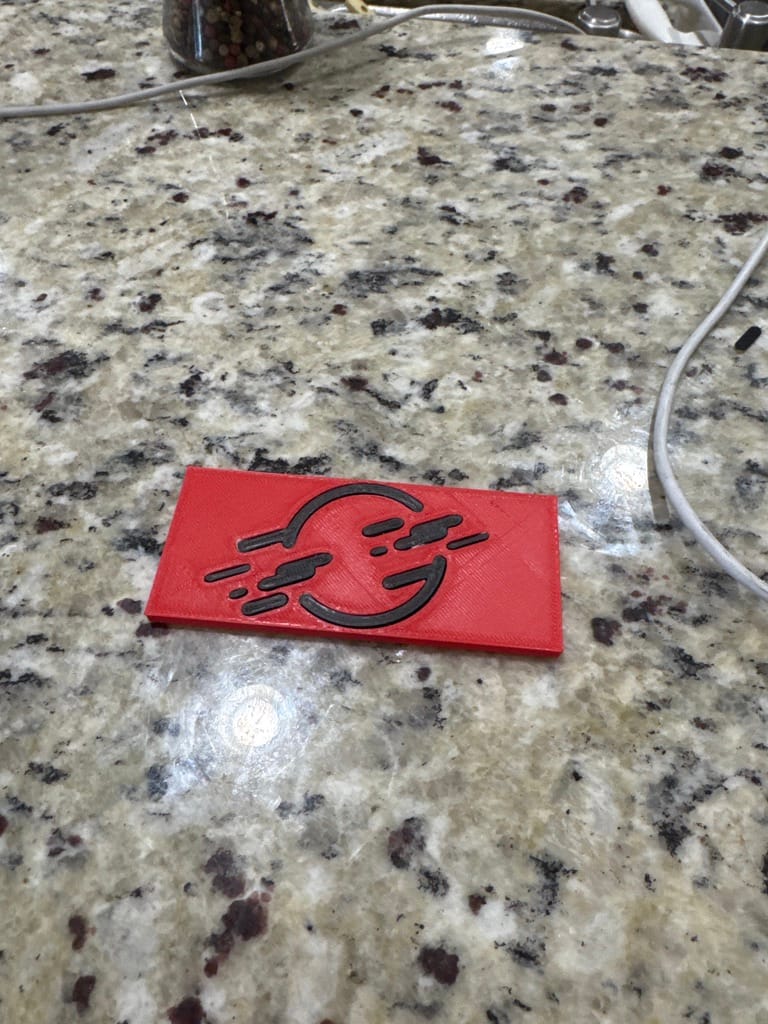
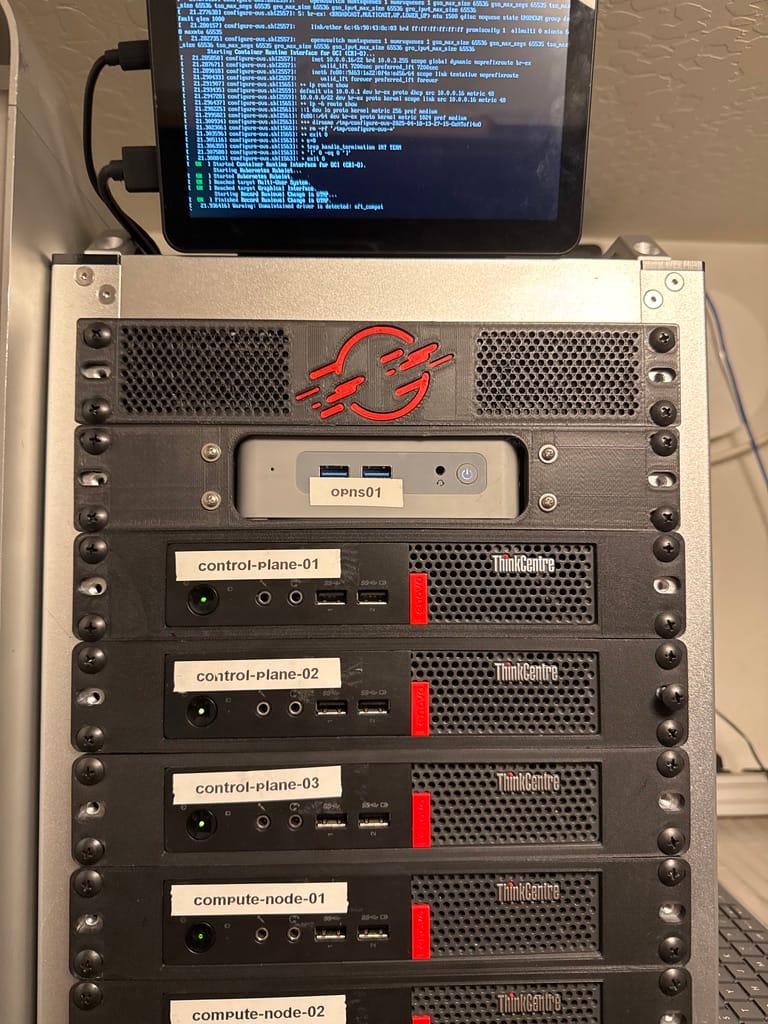
But then I had a really crazy idea. I thought "what if I made the logo glow red?". I tinkered with it for a bit, ultimately landing on printing the logo inlay with translucent PLA and then attaching a red electrolumnescent panel to the back. The end result was, in my humble opinion, kind of bad ass.
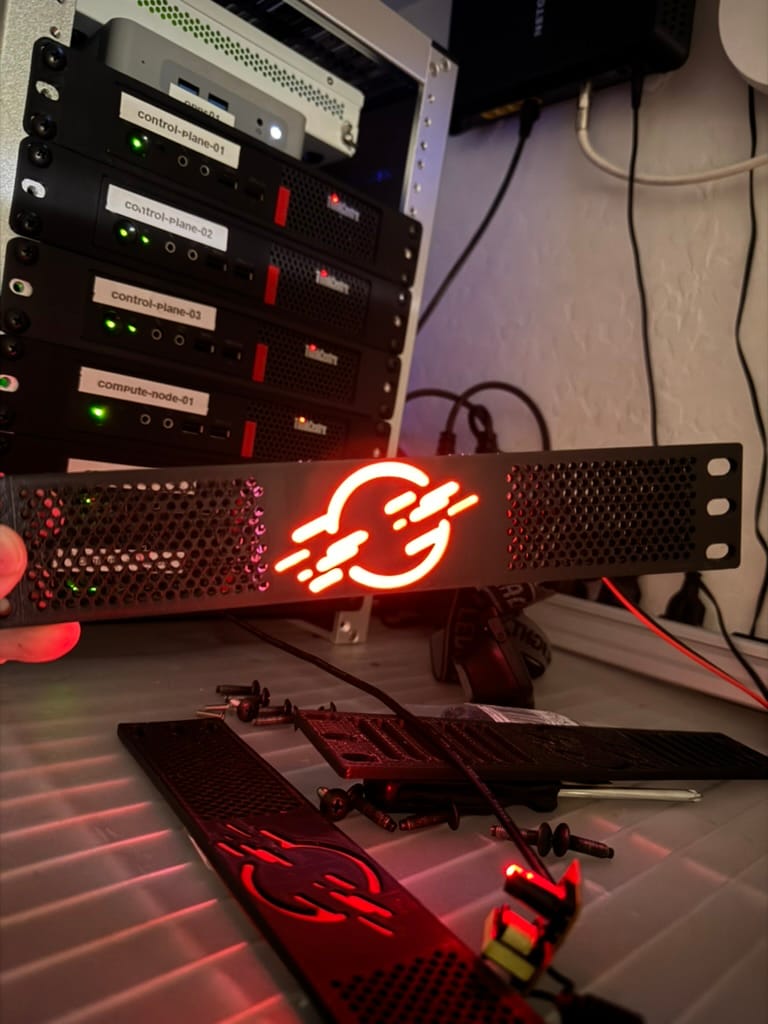
It came out better than I could have possibly hoped. The red EL panel kit I bought originally came with a 2xAA battery pack, obviously not ideal. So I hacked together a USB cable and a step down transformer to reduce 5vdc to 3vdc to power the back lighting off of a USB port on one of the myriad PCs in my rack. It worked like a charm!
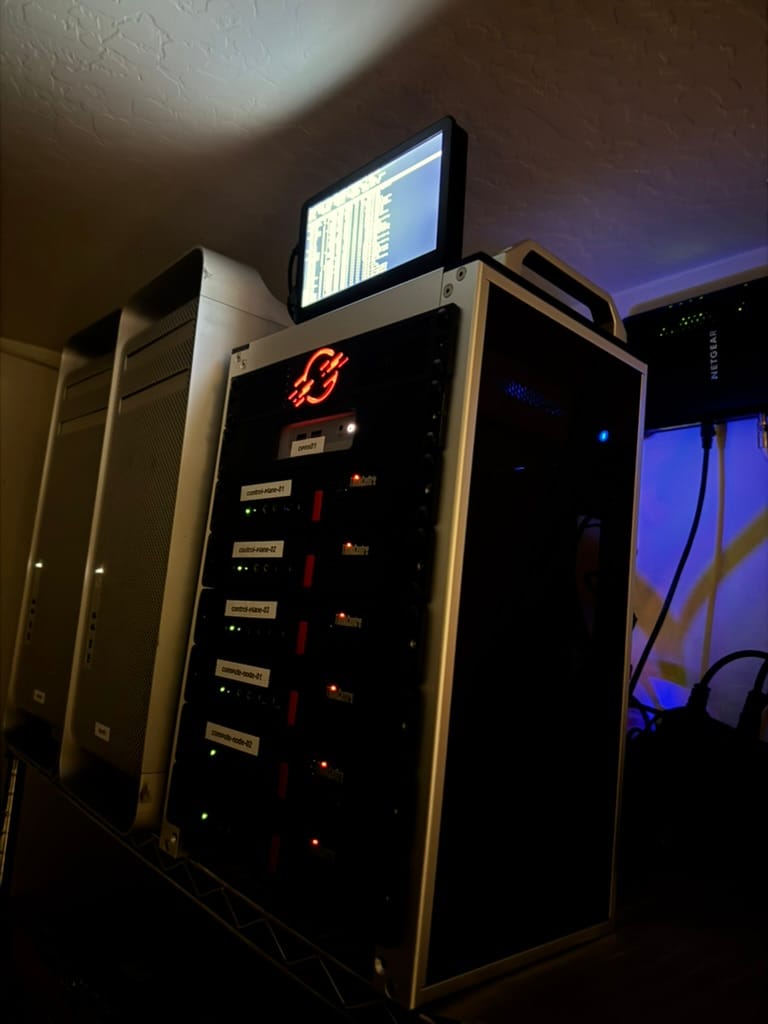
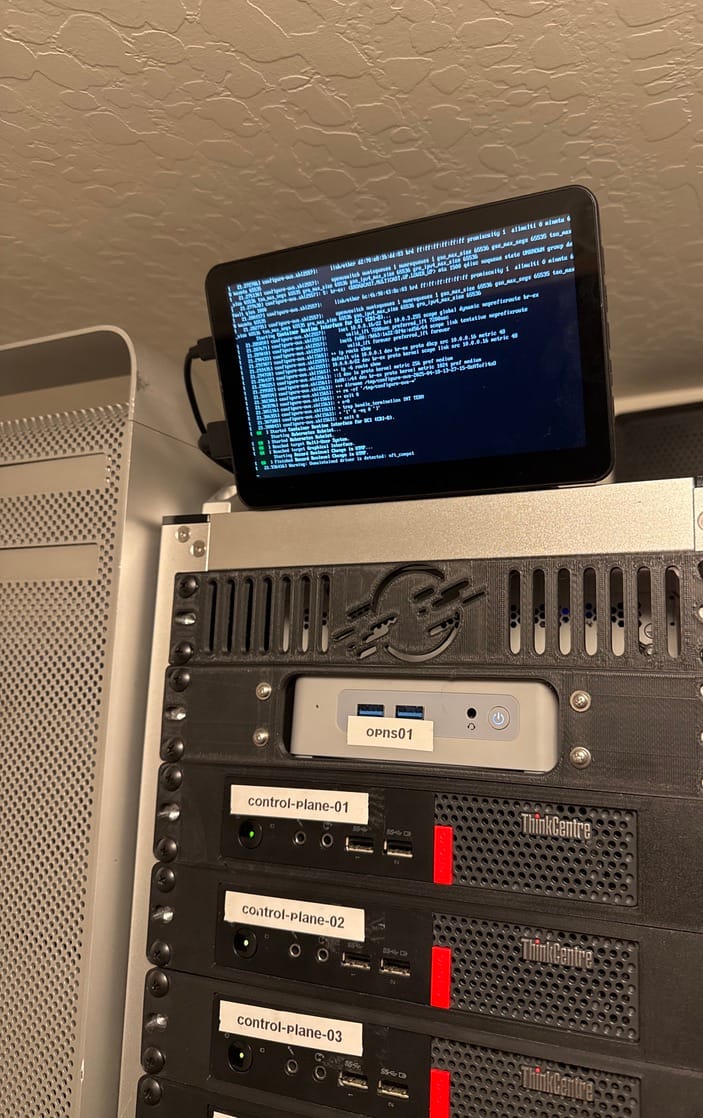
Now lets talk about that display up at the top of the rack. It's a 7" IPS display and it's hooked up to my 8 port KVM switch - which (including the RPi5 bolted to the back of the screen) is exactly enough ports to serve my lab. I ended up spending a ridiculous amount of money on short HDMI and male to male USB A cables to hook up the KVM switch. It turns out that somewhat counterintuitively, the shorter the cables you need, the more money you're going to pay for them. Thankfully, I was able to get everything hooked up, and tamed the tangled spaghetti monster of cables from the previous iteration of my lab. Things are looking nice and tidy... well, tidier. Still kinda bad.
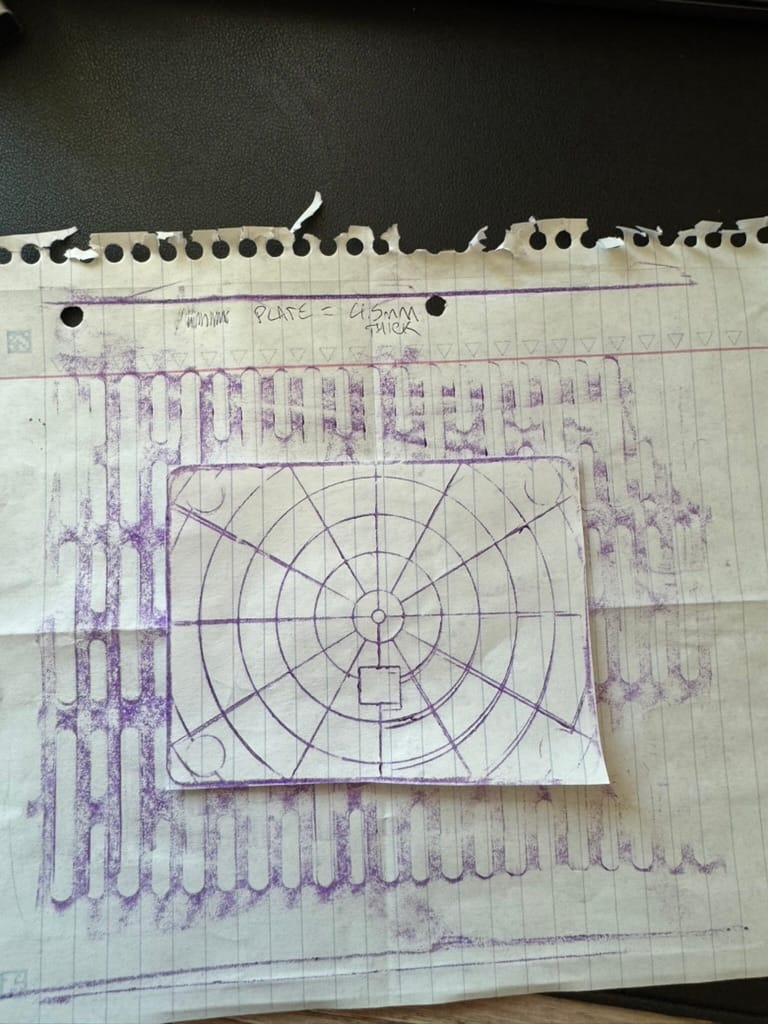
My first swag at attaching the monitor to the top of my rack involved 3M strips, but with the amount of care and attention I'd paid to everything else in the rack below it, this would not suffice. I decided to 3d print a bracket to clip it into place onto the top acrylic panel. Of course, yet again, no model for this existed so I decided to design one. I went "Marine Corps" style and used crayons (yes, crayons!) to mock up the model and then fine tune it in F360. I can't take full credit for this idea, I'm pretty sure Indiana Jones did it first; ala "Raiders of the Lost Arc"

I traced the silhouette of the top panel vents and the bottom of the screen's mount with crayon and then designed the model around it
Here's what I came up with

The screen is now held firmly in place with zero jank factor. Hell, it almost looks like it was made like this it fits so well.
As for the KVM switch, there is just enough room between the side acrylic panels and the brackets for the Lenovos to house my 8 port KVM switch, which fits nice and snug. I can't get to the buttons, but it comes with a remote control so I can switch between video inputs on the fly, which works out neatly.
At this point, I'm actually calling my rack "ready for production"!
Network Upgrades
One of the goals of this project was to clean up my network. I've never been terribly happy with it. When I moved in, I used to have an old HP ProCurve 48 port 1Gbe switch, seen here.
It was the loudest and hottest thing in my lab, and clocking in right at 19" x 1U, it was an unwieldy piece cluttering up my lab without the benefit of a proper rack to sit in. While having that many ports was nice, I really hated that switch. It was so old I had to spin up a Windows XP VM just to manage it (old Java plugin on an ancient version of Firefox). I wrote about managing it here https://blog.cudanet.org/a-little-dust-on-the-bottle/.
I replaced that switch with a TP-Link 16 port managed switch a little less than a year ago, which was fine, until it wasn't. It had enough ports (along with a small dumb switch mounted inside the On-Q box in my utility room where all the ethernet lines in my house are terminated) to serve the whole house. Unfortunately, the TP-Link switch does not fit in my new 10" rack, so I needed to find something that did, which turned into an Easter egg hunt for a managed switch that would fit, and had enough ports. Ultimately, I landed on this MikroTik CSS610-8G-2S+, which has 8x1Gbe ports and 2x10Gbe SFP ports.
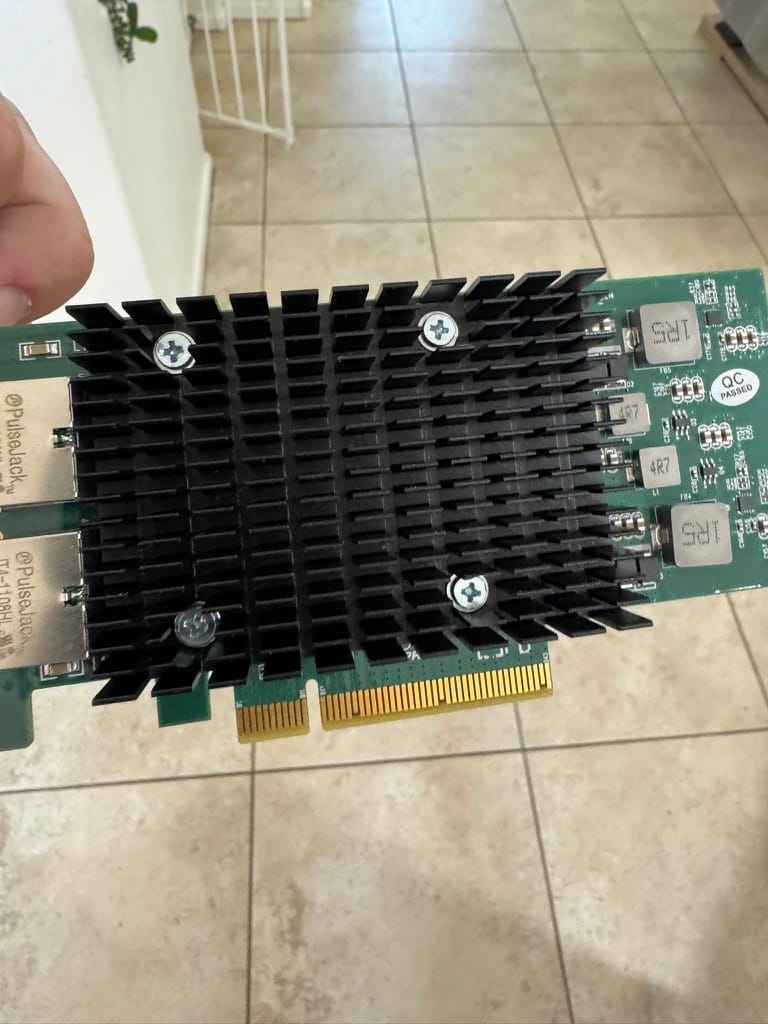
Before the upgrade, I only had 1Gbe networking. My NAS servers are a pair of MacPro5,1s. They were configured with 2x1Gbe in LACP, theoretically giving me a 2 gig pipe to my storage, but in practice I never saw transfer speeds higher then a couple hundred megs per second. I decided that in the interest of reducing the number of ports in use, and potentially improving my storage performance in the process, I pulled the trigger on adding some 10G cards to my NAS servers and picked up a couple of the necessary SFPs for the switch, reducing the number of ports needed from 4 down to just the 2 SFPs. I ended up purchasing these Intel X540-AT2 cards and these 10Gtek 10Gbps copper SFPs. I selected this specific hardware for compatibility reasons.
Of course, no homelab project is complete without a trip or two to the hardware store. It turned out that the retention clips for the heat sinks on the new 10G cards stuck out just a little too far from the bottom of the cards and were hitting the cooling fans on the graphics cards in my Mac Pros. I ended up getting some M3x8mm screws with washers and nuts to attach the heat sinks to the cards, and replaced the awful factory thermal pads.
With the 10G cards no longer hitting the fans on my GPUs, I set about reconfiguring my NAS servers to use only the 10Gbe NICs. After a little trial and error (and a few failed attempts to enable jumbo frames) I was finally in business. 4 ports reduced to 2, and a huge improvement for storage transfer speeds. I'm seeing a sustained 1.6Gbps on large file transfers which, while not being the full 10Gbe, is a big jump. At this point I believe I'm actually hitting the maximum disk throughput of these old Mac Pros.
As for the other 8 ports, 6 are taken up by my Openshift cluster, one goes to the Opnsense router and the last port goes to a switch mounted in my On-Q panel which serves the rest of the house. It turned out I had exactly enough ports with the new switch and I was able to remove the 16 port TP Link switch from my lab without disruption. Other than a couple of smart bulbs dropping off the wifi during the shuffle, the change was relatively non-invasive.
All in all, condensing my lab down from the sprawling mess of computers and rats nest of cables to something about the size and shape of an ATX case has been a long journey, but one absolutely worth taking. If you have a lab running a few RPis or NUC clones, I would highly recommend considering a mini rack if for no other reason than it just looks a lot cooler than a pile of computers with a mess of wires sticking out the backs cobbled together.