If at first you don't succeed... RTFM
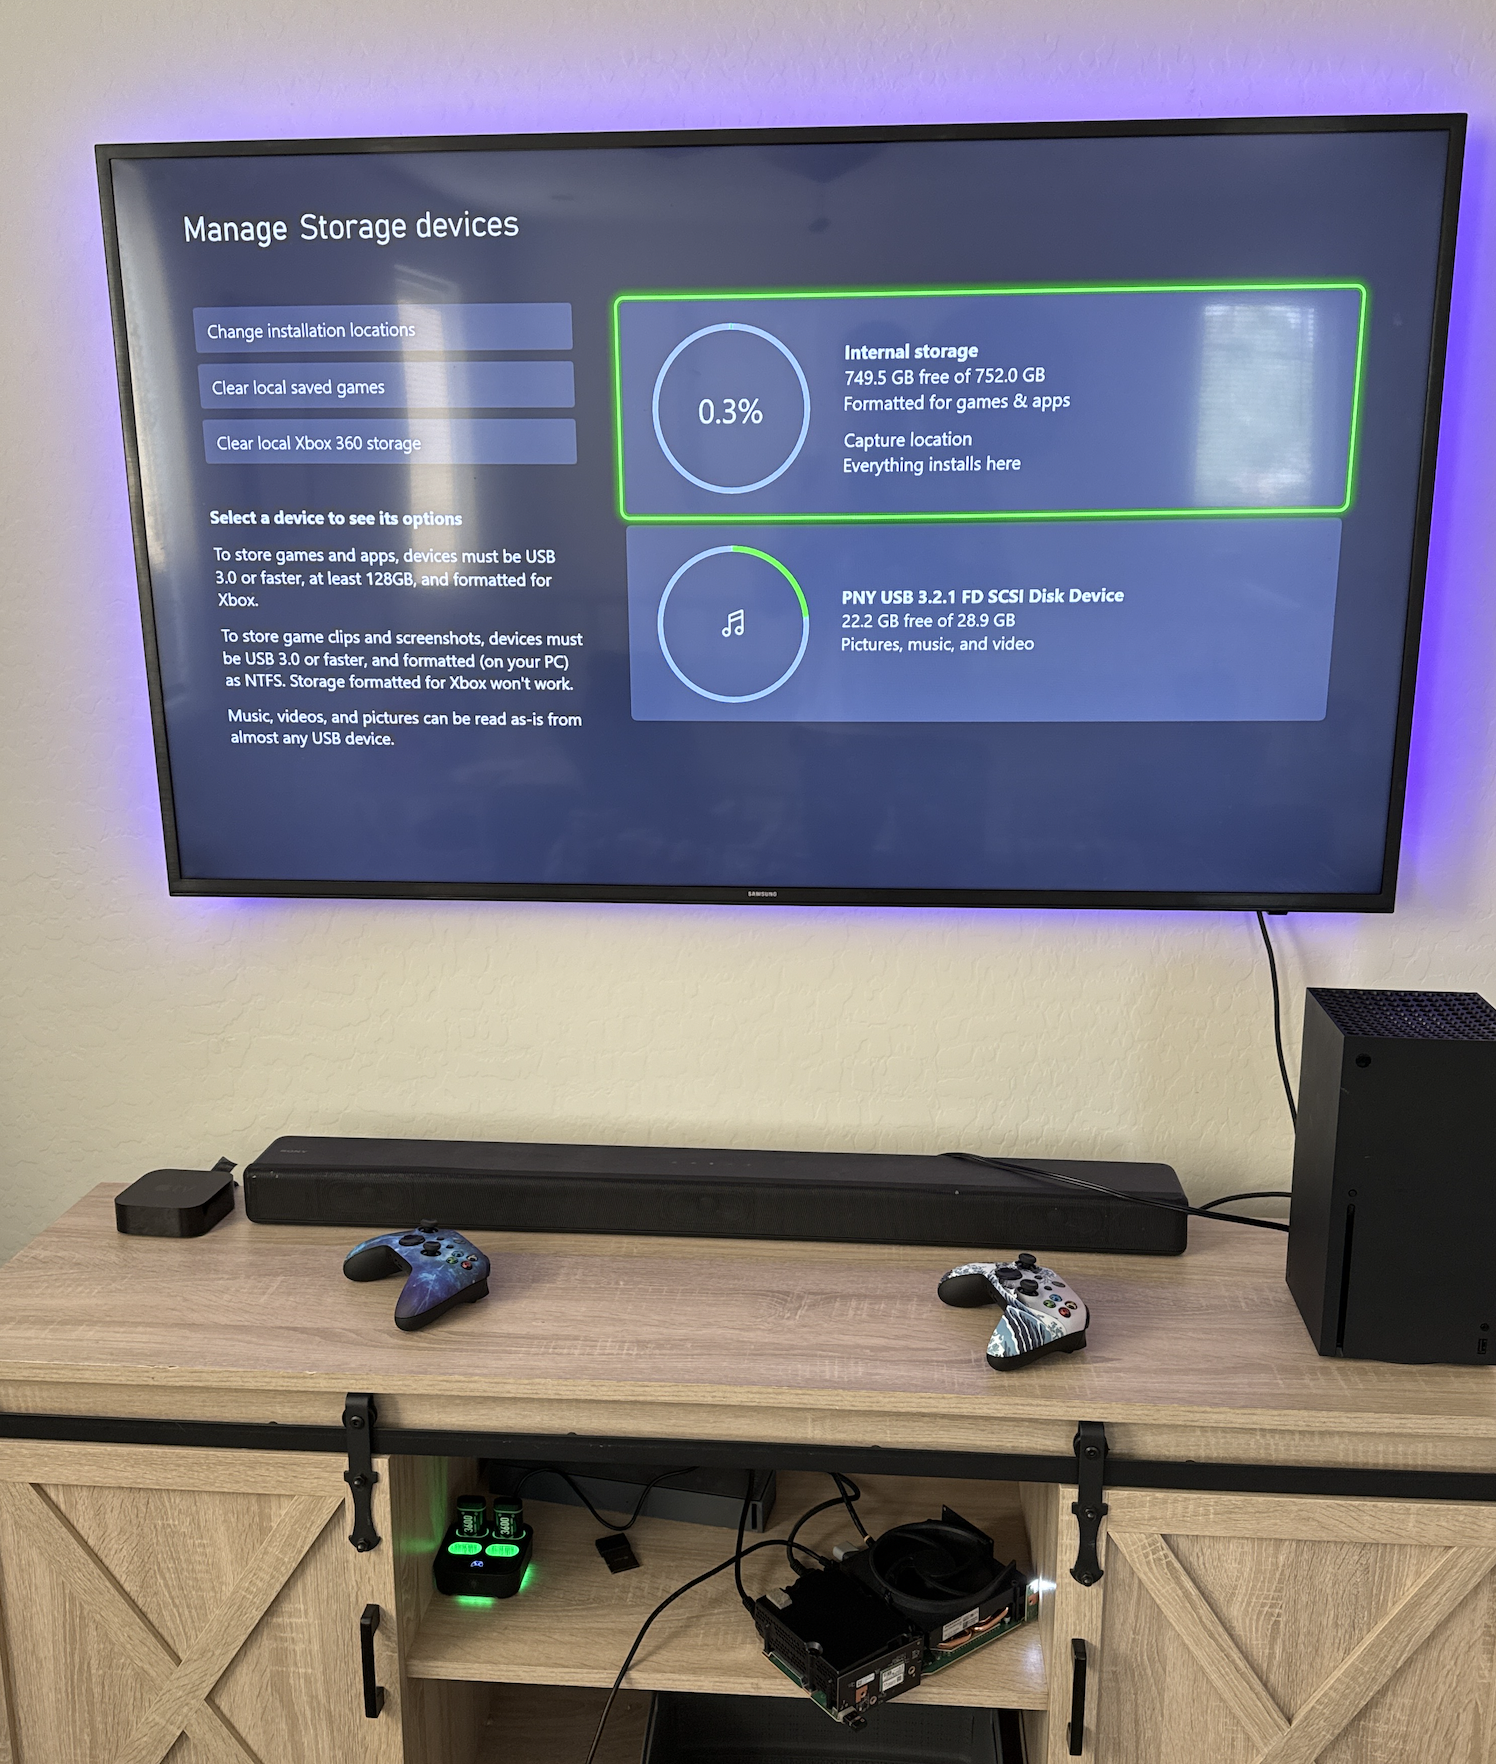
Okay, admittedly nobody exactly writes an instruction book with step by step instructions on how to modify game consoles in ways their manufacturers really don't want you doing, but if you're brave enough there are certainly some intrepid tinkerers out there who make some content (primarily on Youtube, unfortunately). I recently picked up an Xbox Series S "for parts/repair" for $100 and was able to fix it and get it working again, thanks in large part to pro-right-to-repair sites like iFixit with their very complete tear downs and videos from YouTubers like TheC0d3r and TronicsFix, who do repairs and mods ranging from routine to utterly ridiculous, I was able to cobble together enough information to be dangerous. I wouldn't claim to be in the same class as any of these smart, brave folks but with my background in electronics and computers, I feel at least confident enough to follow in their footsteps and repeat their successes.
After the work I put into fixing this console, the end result was... an Xbox Series S. A new-in-box Xbox Series S will run you about $300. It boasts a lower price tag than its big brother, the Xbox Series X, but that comes with some pretty notable drawbacks. First and foremost, lower performance on a lot of games (mostly AAA titles). However, considering I picked this console up for my step son who mostly plays Fortnite, Roblox and Minecraft, it's not that big of a deal in my case.
The other major difference between the Series S and X is that the latter has an optical disc drive, while the former is digital only. This wouldn't be that big an issue except that the Xbox Series S has only ever shipped with a meager 512GB internal SSD, with only about ~300GB of which being usable for games. You literally can't even install the latest Call of Duty on a Series S. If you need more storage, your options are both extremely limited and expensive. Microsoft licenses only 2 manufacturers to make storage expansion cards for the Series S|X; Western Digital and Seagate, and the price per GB is nearly 4x what you would pay for any standard NVMe drive. A 1TB expansion card will run you about $150 while a 2Tb comes in at a slightly better value per cost at around $230. But considering that the Xbox Series S new-in-box starts at around $300, it seems a little ridiculous to spend that kind of money to fix what to my mind is an (intentional) engineering flaw.
My opinion of the Xbox Series S isn't exactly positive. It is the lowest barrier to entry into the current (10th) generation of game consoles, but only makes it across the line by cutting corners in the process. Meanwhile, you could just pony up an extra $150 up front for an Xbox Series X, which starts at about $450 and avoid all the shortcomings of the Series S entirely. In short - the Xbox Series S is a console that makes no sense.
As an aside, my absolutely thermonuclear hot take is that - in my opinion all modern consoles are ridiculously, unreasonably overpriced and unlike most previous generations of game consoles, they hold almost no intrinsic value since nobody actually "owns" their games anymore. In the past, you bought a game and you owned the game and that was it. Nowadays, even if you shell out the cash for a copy of a game, invariably you're going to need to have your console constantly connected to the internet just to keep the damn thing updated and compatible, and in a lot of cases you'll have to continuously pay for some kind of subscription or in-game currency to actually be able to play it. This has led to a terrible scenario where many titles are incomplete at release and what should have been features or bug fixes done prior to launch are offered as DLC - often for an additional cost. Now, I'm not blaming developers; it's the profit above all motives of the corporations that fund them. A game doesn't cost just $50 anymore. Over the course of the time you play it, it's probably going to cost you almost what you paid for your console itself, which in my mind is a very bad thing. Microsoft, Sony and Nintendo could all slash the prices of their consoles and subsidize the difference through subscriptions or micro transactions - which of course they already do. But they do that on top of price gouging consumers for hardware that is by design intended to lock you in to a given software ecosystem, which is just not cool in my opinion. I'm not saying that game consoles are bad, but I'm certainly not advocating that they're all that good either. They're a means to an end, and for non-techy people the path of least resistance to getting to enjoy the latest and greatest video games. But we're living (arguably) in the throes of late stage capitalism where conspicuous consumption of 'prestige' products like flagship phones and AAA video game titles has pushed the Overton Window of what consumers are willing to pay far beyond the reasonable limits of their intrinsic value or utility. But I digress... This is an article about modding a console, not about consumer rights... or is it? 🤔
Back to this Xbox Series S. As I pointed out, the Xbox Series S' big glaring deficiency is the tiny 512GB SSD it ships with. After doing a somewhat exhaustive amount of research - it was certainly exhausting - I came to the conclusion that it is in fact possible to upgrade an Xbox Series S from 512GB to 1Tb, however the process of getting there is neither easy nor for the feint of heart. If you mess it up you will brick your console.
The first hurdle you're going to encounter is hunting down a compatible SSD. There is an extremely short list of drives that will work. Every Xbox Series S ships with a 512GB Western Digital CH SN530. The Xbox Series X on the other hand has shipped with a handful of other drives, which if you read Microsoft's marketing materials, are billed simply as 'Custom 1TB SSD'
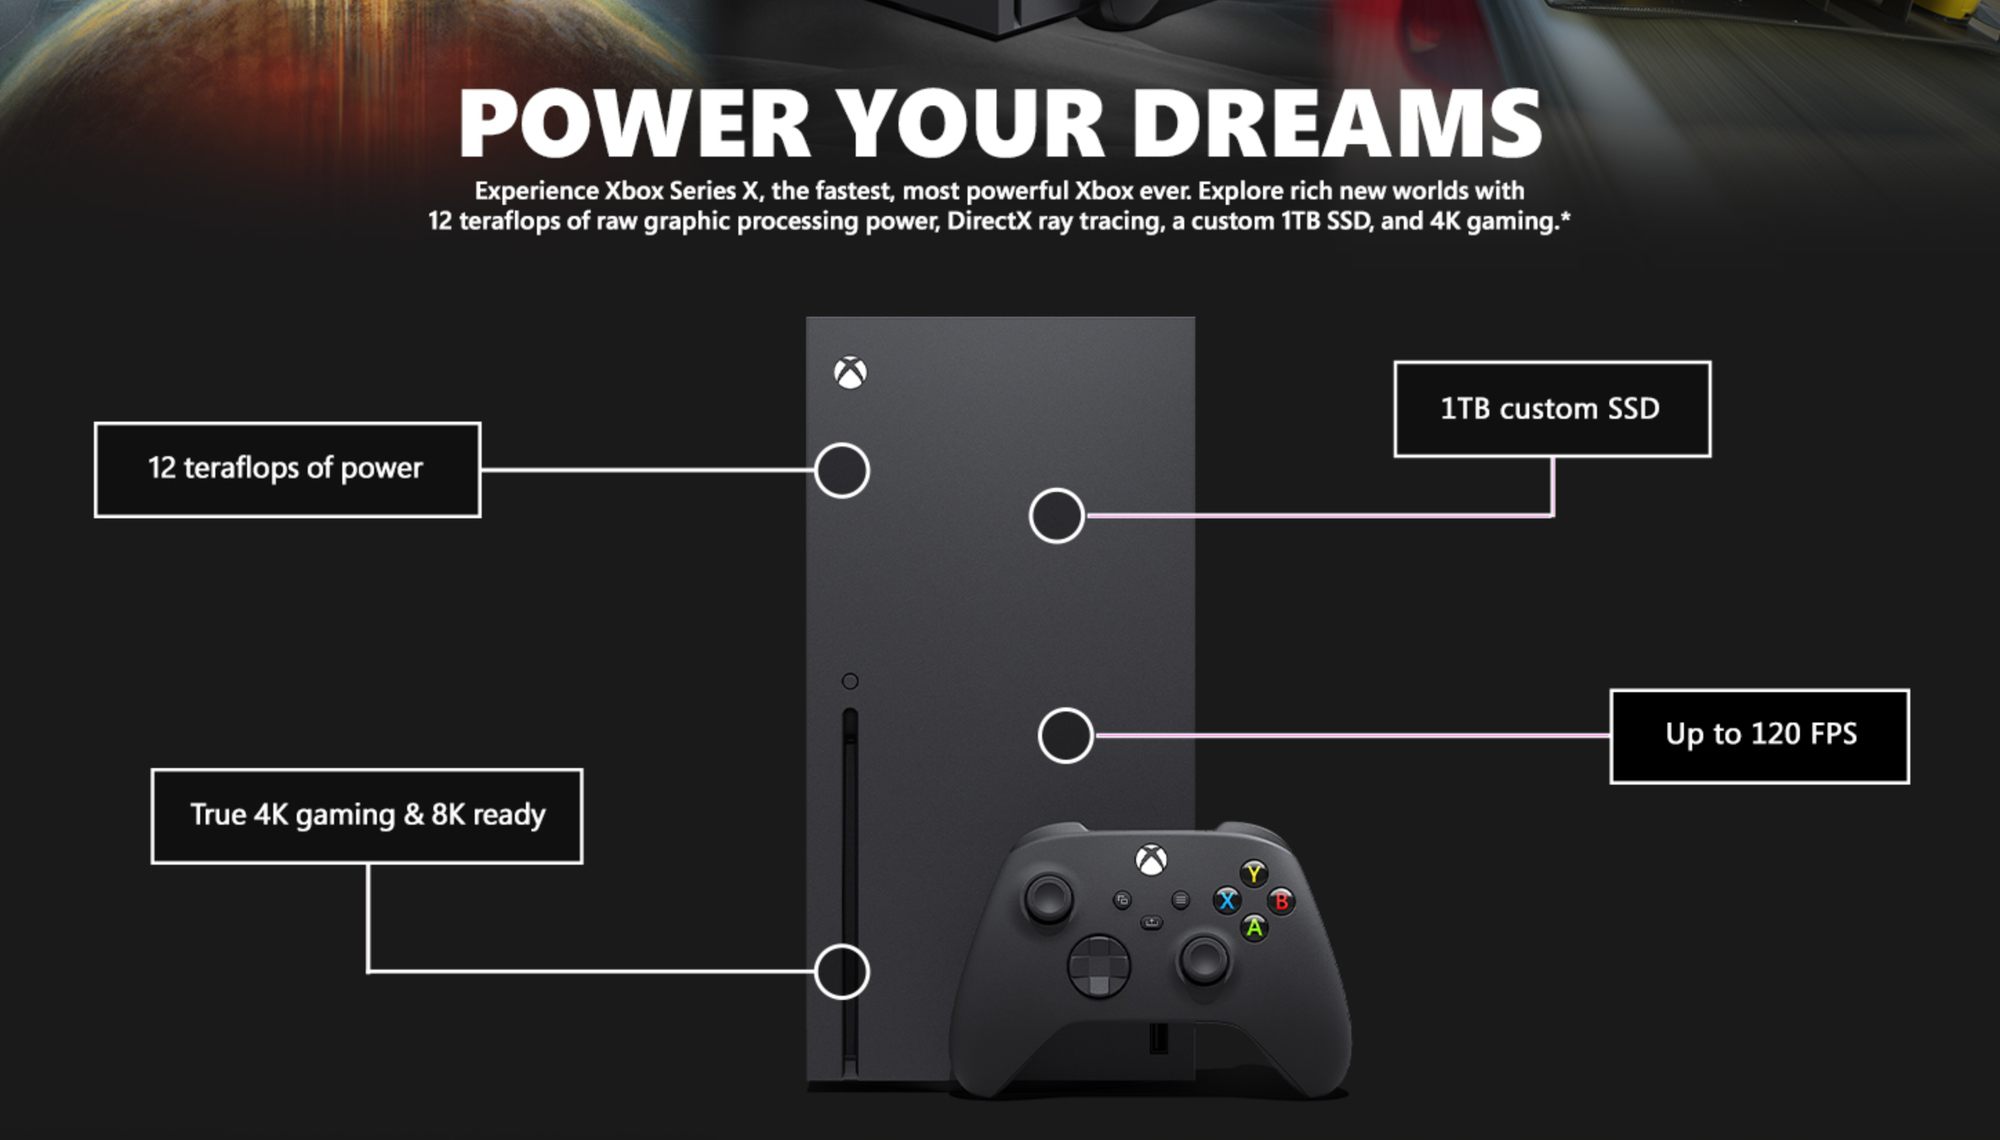
which is actually not untrue - basically the only way you're going to get your hands on a compatible SSD is if it was pulled from an Xbox Series X. What makes these SSDs 'custom' is that they are NVMe 2230 form factor m.2 drives that have a custom ASIC which allows for PCIe 4.0x2 and more lanes, however limited to PCIe 3.0 speeds for a max throughput of up to 2.4Gbps. These are truly oddball hardware from a technical standpoint. But the long and short of it is - if it didn't come out of an Xbox, it ain't going in one - which does raise some concerns about the longevity and repairability of these consoles, but that's a whole other topic.
Now, as far as what specific models are actually supported, there are only five that I've been able to confirm (mostly by watching teardown videos and searching eBay):
- Western Digital CH SN530 512GB (from my Series S)
- Western Digital CH SN530 1TB
- Lite-On XA1-311024 1TB
- Solid State Technology M1106374-007 1Tb
- Western Digital CH SN560 1TB *
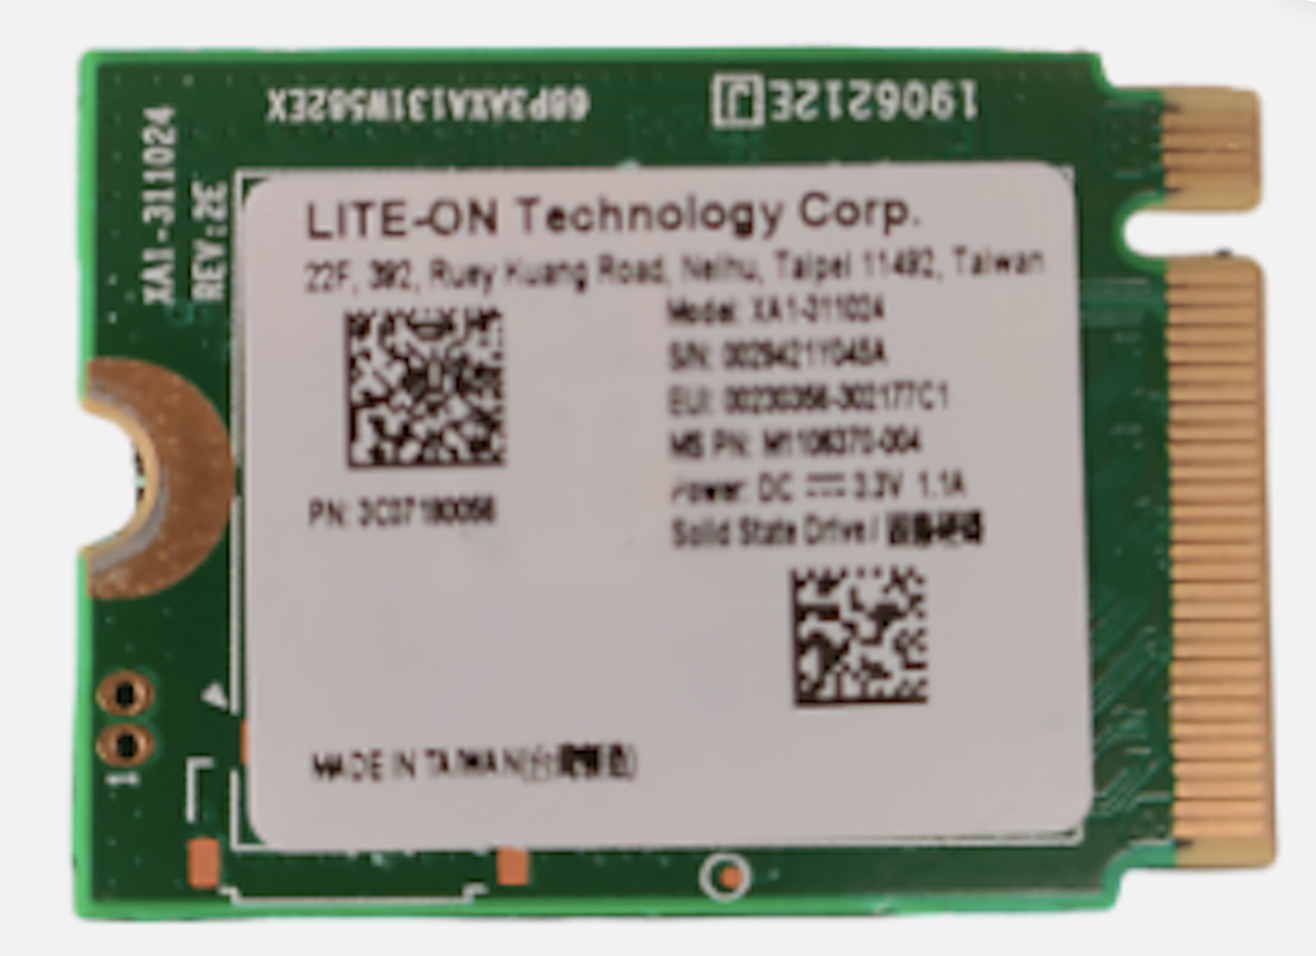
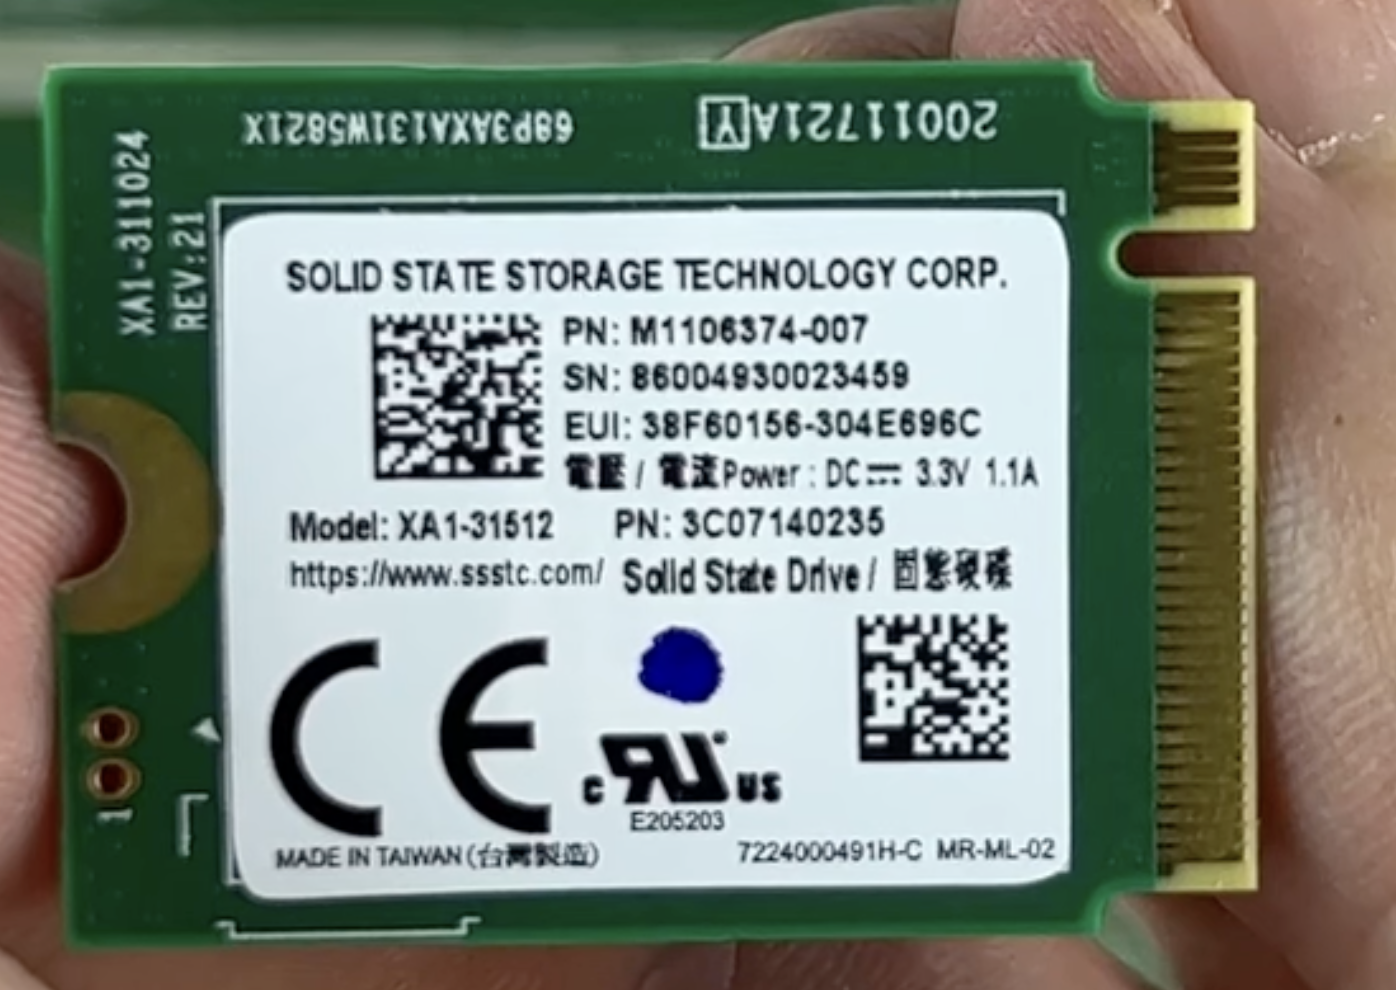
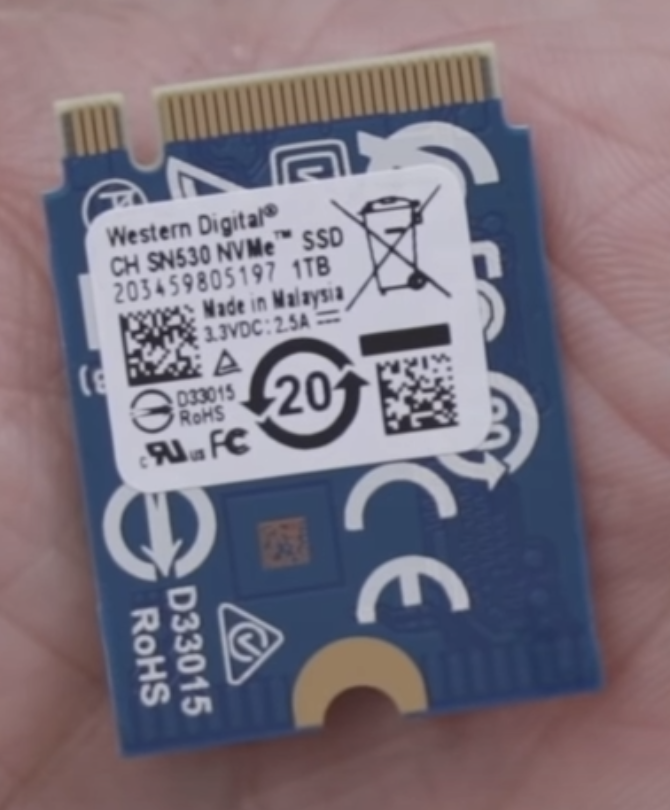
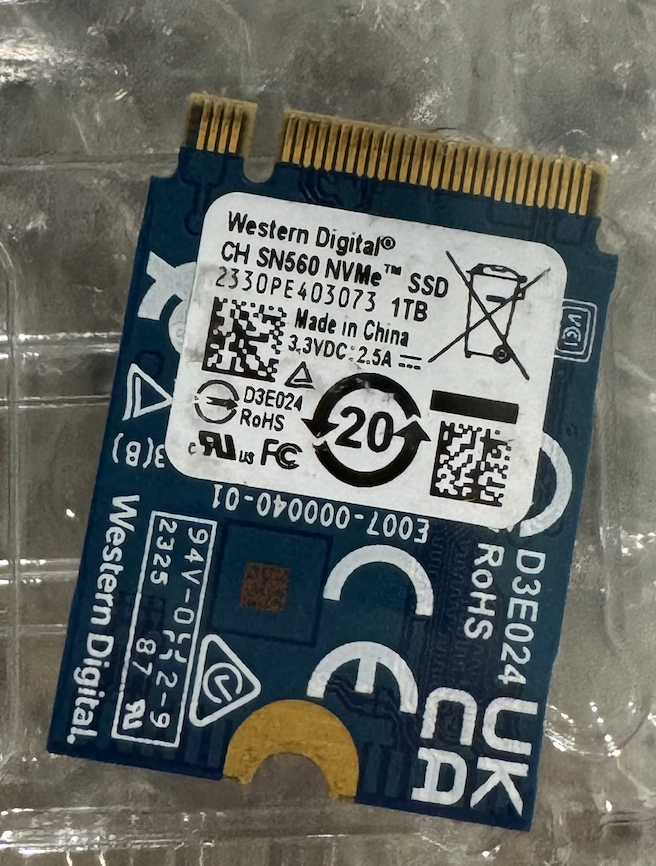
While this hardly constitutes an exhaustive hardware compatibility list, it at least gives me some options to choose from. There can certainly be others, but these 5 models I've visually confirmed with my own eyeballs. Well, actually that's not entirely true... The WD CH SN560 1TB actually took a bit of a leap of faith, which brings us to the fun part of the story.
I purchased a Western Digital CH SN530 1TB for $80 from a seller on eBay, shipping from China and then I had to hit the road for a few days and kind of forgot about it. When I got back once I had a little free time, I decided to take a crack at it. I eagerly opened the package only to find that what I had received wasn't a WD CH SN530, it was a WD CH SN560 - which up to that point, I'd seen absolutely no reference to online. I was a little irritated, thinking I'd just been fooled by a bait and switch. My first thought was to just return it and try again - womp womp. But I figured, what the heck, I might as well try it. If it's incompatible, the Xbox just shouldn't even turn on right? So I tried to upgrade my SSD. Let's just say the first attempt did not go well... So I started the return process and waited for the seller to send me a shipping label. The next day the seller reached out to me telling me that the SSD had in fact been pulled from an Xbox Series X, and that the CH SN560 was actually slightly faster than the CH SN530 at the full 2.4Gbps vs. the 2Gbps the latter is rated at. I was skeptical to say the least, but then I noticed something about the card that gave me a glimmer of hope. In between the chips on the SN560, I noticed a little bit of neon blue thermal paste residue - the exact same color as the awful thermal "goop" that I replaced on my Xbox when I fixed it.
So I started scouring the Internet for any shred of evidence to support the eBay seller's claim that this SSD came out of an Xbox Series X. I found a comment from a user on iFixit which specifically mentioned the SN560 from back in 2022 which generally confirmed what the seller said
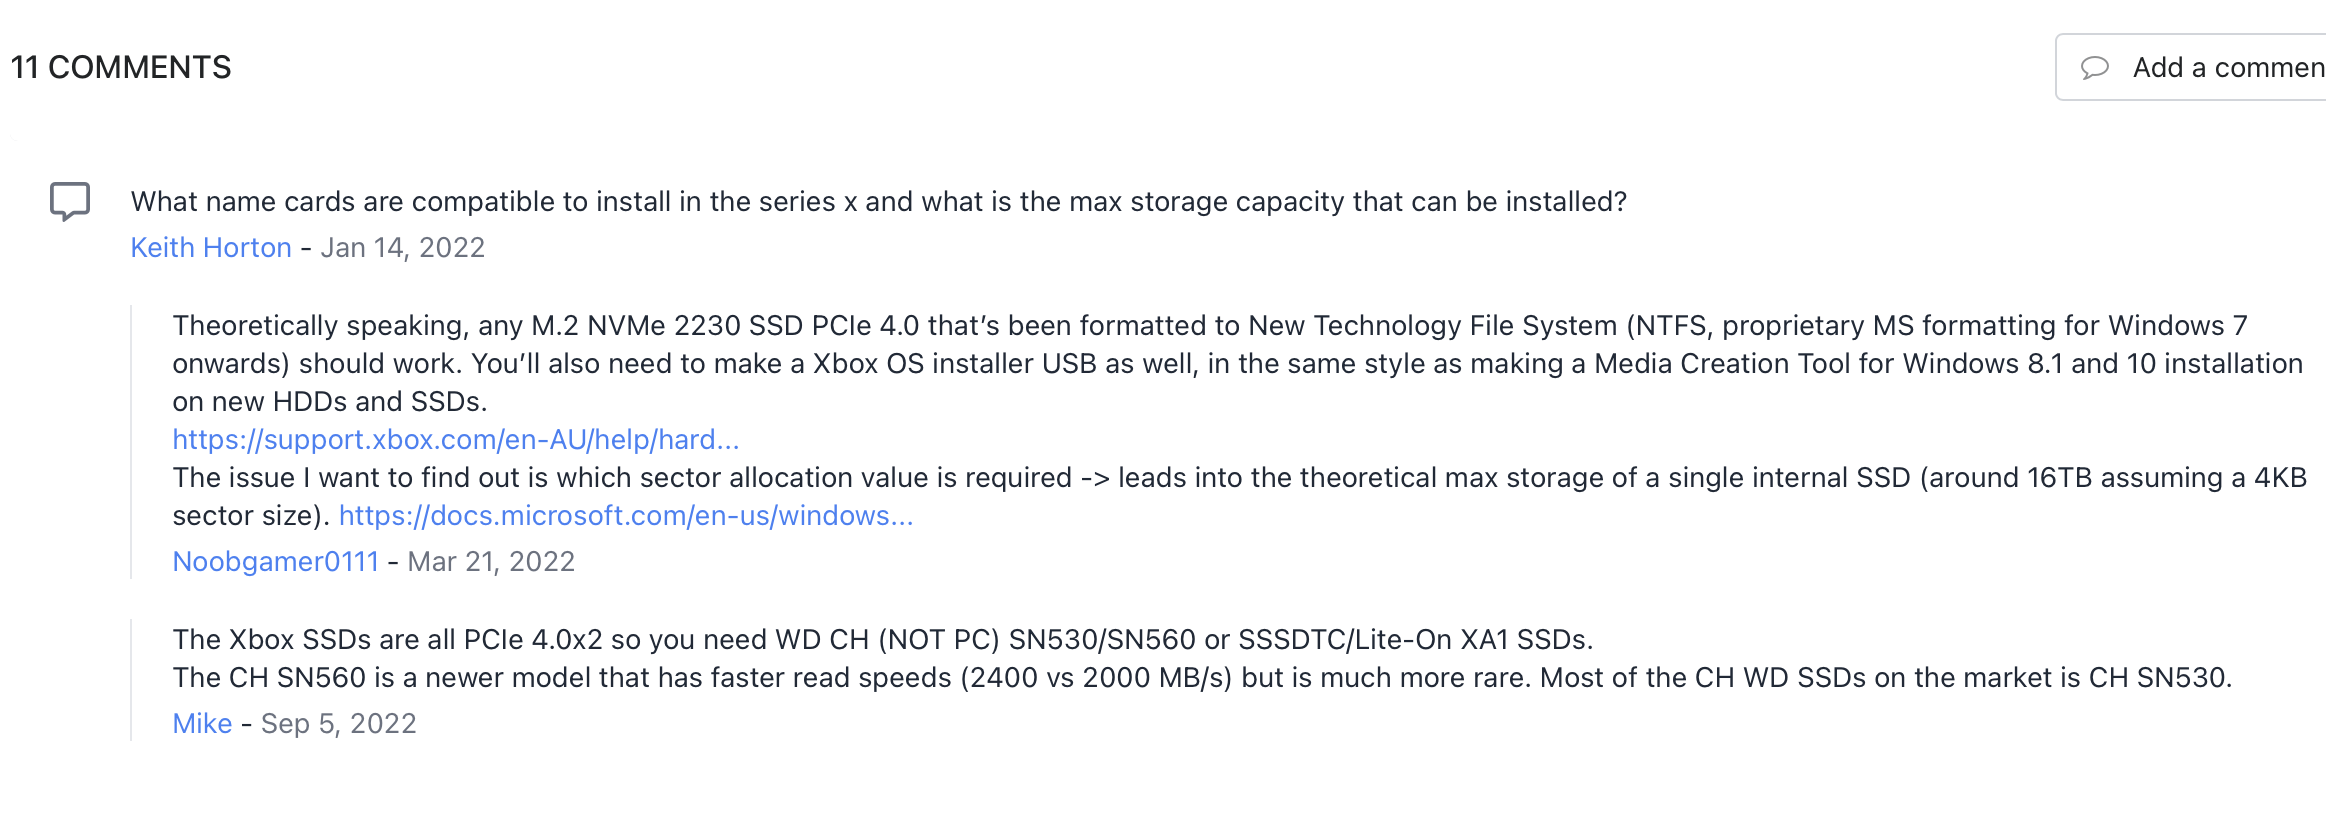
but what finally sealed the deal for me was when it occurred to me - hey, why don't I search eBay specifically for drives pulled from an Xbox? duh... And bingo!
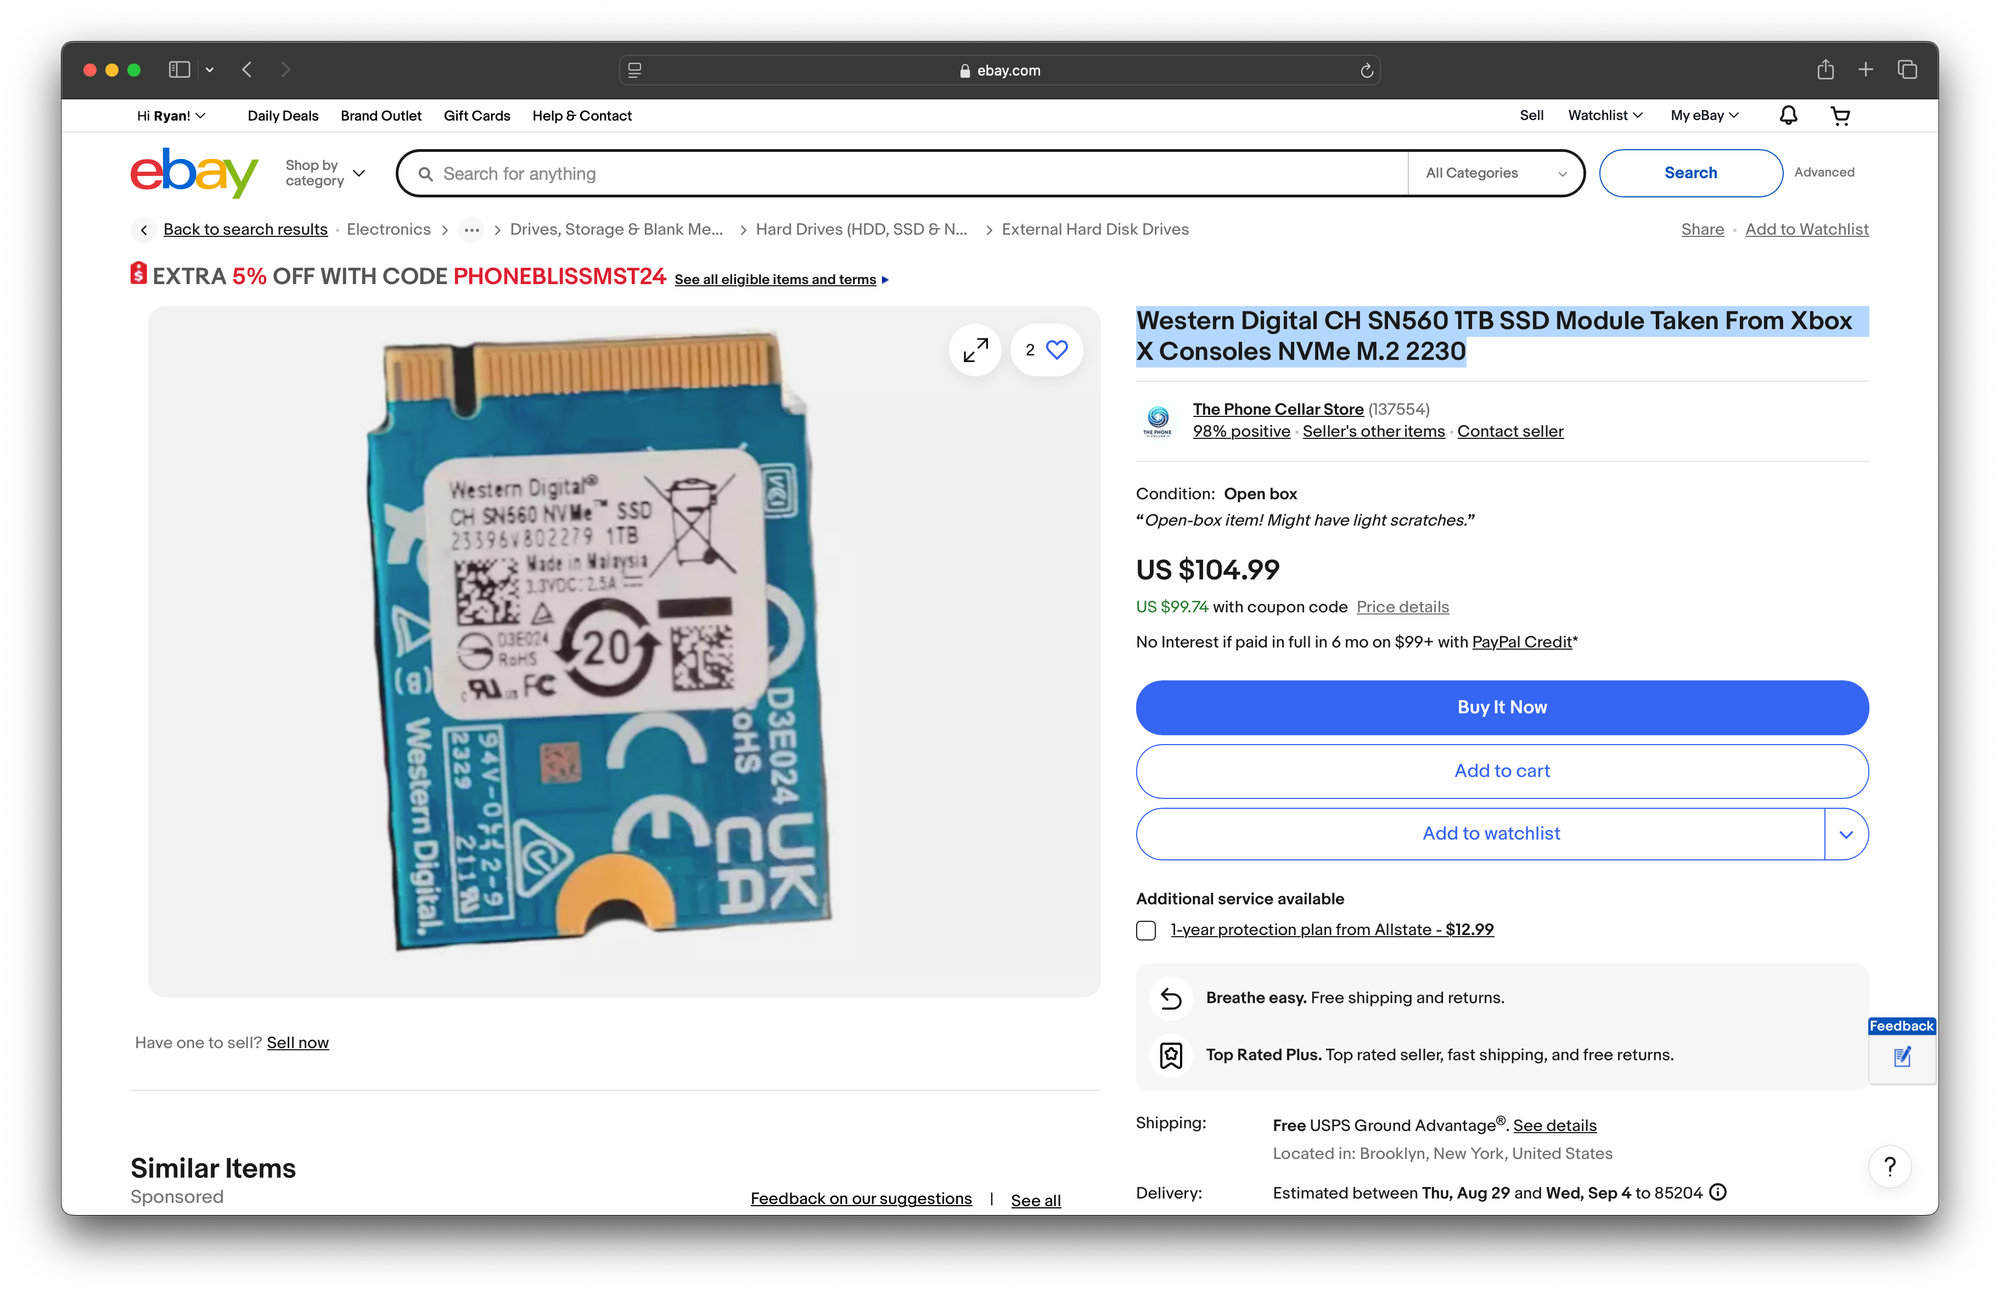
Lo and behold - the first result was a listing for a Western Digital CH SN560. So, my critical thinking skills successfully applied and my wannabe journalistic principles satisfied (always verify from 3 sources) I felt confident enough to proceed.
With my 1TB SSD in hand, I started looking into what it takes to actually do the upgrade. It's not a straight swap, as you might expect. This is Microsoft after all. Your SSD is keyed to your console, and that key is rotated every time the firmware is updated or factory reset. This form of DRM is not terribly sophisticated or complex, but it does make the task just cumbersome enough as to be a deterrent from the majority of consumers attempting it themselves, as among other things, it requires complete disassembly of your Xbox console. The screw holding the SSD to the main board is literally the last one you remove.
As far as I've been able to discern, your console's "key" consists of 2 things - the partition table itself, and a 1gb 'XBFS' partition at the beginning of the drive containing the key. I'm assuming the key contains a hash of the partition table or something, and some kind of hardware specific identifier - probably some kind of unique ID tied to the APU (since the APU is how banned consoles are identified).
The Procedure
The process of performing this upgrade goes as follows:
- perform a factory reset of your console
- disassemble the console and remove the SSD
- take a partial backup of the drive*
- clone the partial backup to the 1TB SSD
- install the new 1TB SSD and partially reassemble the console
- perform an offline update
- set the console up, verify the new capacity is detected
- add the boot animation back (optional, but highly recommended)
- factory reset - again
- finally, set your console up
If that seems like a lot, yeah. It is, and I'm pretty sure that's precisely the point. Disassembling an Xbox isn't terribly hard, but it is a hassle. But if you mess up any step with handling your key, you can actually brick your Xbox. I highly doubt that Microsoft wants consumers to be able to either repair or upgrade their Xbox Series S (or X for that matter). The potential for an inexpensive upgrade path to a 1TB Xbox Series S console completely undermines the value proposition of the Xbox Series X. Also, it must be said that NVMe drives have a finite lifespan, and as such, when the one in your Xbox dies your console is a brick. Your options there are to;
A. Send it in to Microsoft for repair under warranty (expires after just 1 year)
B. Send it in to Microsoft for repair out of warranty which will cost you about $300 and several weeks (meanwhile a new Series S can be on your doorstep by 6PM for the same price...)
C. Buy a new console (see option B).
Don't think that all of that isn't entirely by design. Personally, I choose option D. replace the SSD myself.
What you'll need
you're going to need a couple of things:
- a torx t8 screwdriver
- a compatible 1TB SSD
- an NVMe to USB adapter
- a thumb drive at least 6GB
- a computer running Windows*
- a copy of the latest offline firmware update for Xbox
- thermal paste and pads*
I have a set of electronics repair tools I use for all of these kinds of project. This is the one I use
https://www.amazon.com/gp/product/B087N6XM56/ref=ppx_yo_dt_b_search_asin_title?ie=UTF8&th=1
Refer to the table of compatible SSDs above. I paid $80 for mine on eBay, YMMV.
You'll need a B (or B +M) key NVMe to USB adapter like this one https://www.amazon.com/gp/product/B07MNFH1PX/ref=ppx_yo_dt_b_search_asin_title?ie=UTF8&psc=1
Any thumb drive should do, USB2 or 3 should be fine
As for the computer using windows... that's debatable. Microsoft's official offline update instructions state you need to create the USB drive from a Windows machine - my guess is that the wonky way that Windows creates partitions on disks might be required, but I can't verify that. It was easy enough to just format the thumb drive on Windows and go from there.
You can always grab the latest offline update bundle (called OSU1.zip) from here https://support.xbox.com/en-US/help/hardware-network/console/offline-system-update
And last but not least - thermal paste and pads. It's no secret that the Xbox Series S in particular has problems with overheating. This is partly due to its cramped design, and largely to do with the crap quality neon blue thermal goo that they use. It's not exactly a pad, and it's not exactly paste either. It's somehow neither and in all honesty it doesn't work that great. While you've got your console disassembled, although not part of this upgrade, I'd highly recommend a good cleaning and replacing all the pads and replacing the thermal paste on the CPU with something better than whatever crusty garbage they apply at the factory. I used these on mine and they work great, along with a fresh coat of Arctic MX-6
https://www.amazon.com/gp/product/B096ZNHY8F/ref=ppx_yo_dt_b_search_asin_title?ie=UTF8&psc=1
https://www.amazon.com/gp/product/B09VDKSMQL/ref=ppx_yo_dt_b_search_asin_title?ie=UTF8&psc=1
Step 1. perform a factory reset of your console
This part is really pretty straightforward. Just make sure you erase everything. Do not leave games on your drive as they wouldn't be copied onto the new drive anyway. Follow these instructions here
Step 2. disassemble the console and remove the SSD
iFixit has a wonderful step by step how to guide on this https://www.ifixit.com/Guide/Xbox+Series+S+SSD+Card+Replacement/141304
Step 3. take a partial backup of the drive
This is literally the only "dangerous" part of the process. If you screw this up by doing something dumb like accidentally messing up your original SSD, congratulations - you just got a brick.
Now, this part is not terribly complicated, you just need to do it right. Basically all of the "guides" I've seen on this are done on Windows using 3rd party tools like Macrium Reflect, which honestly makes my skin crawl thinking about.
As I explained before, your console key consists of the partition table and the first partition on your disk, and is rotated every time your console is reset or updated, so with our freshly reset Xbox, we should have a brand new key. Personally, I just used dd to back mine up using my Mac, but you could do the same on Linux. Pop your original 512GB SSD into the USB adapter and plug it in to your computer.
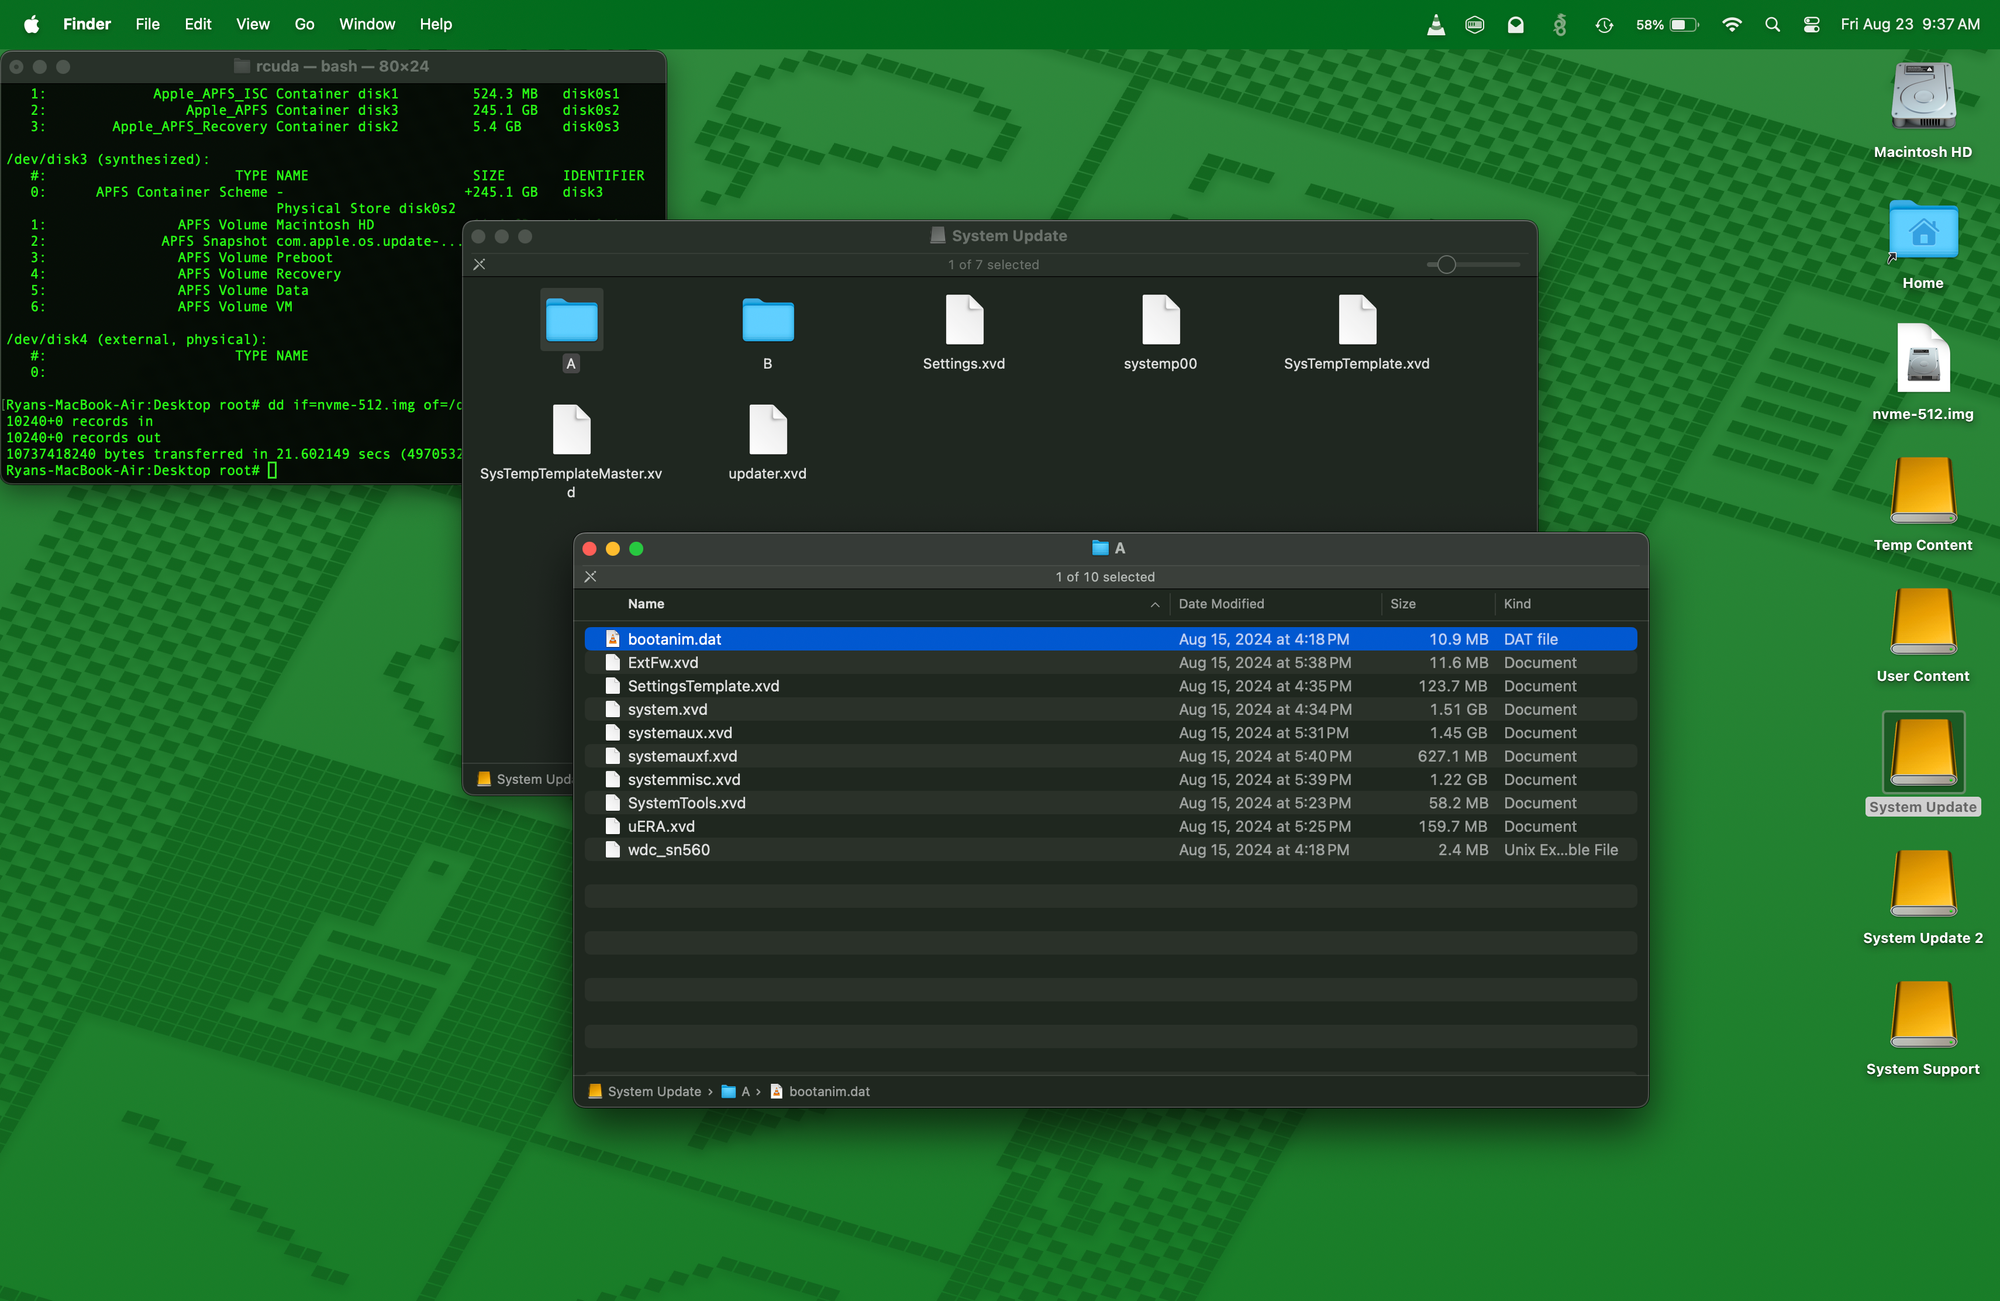
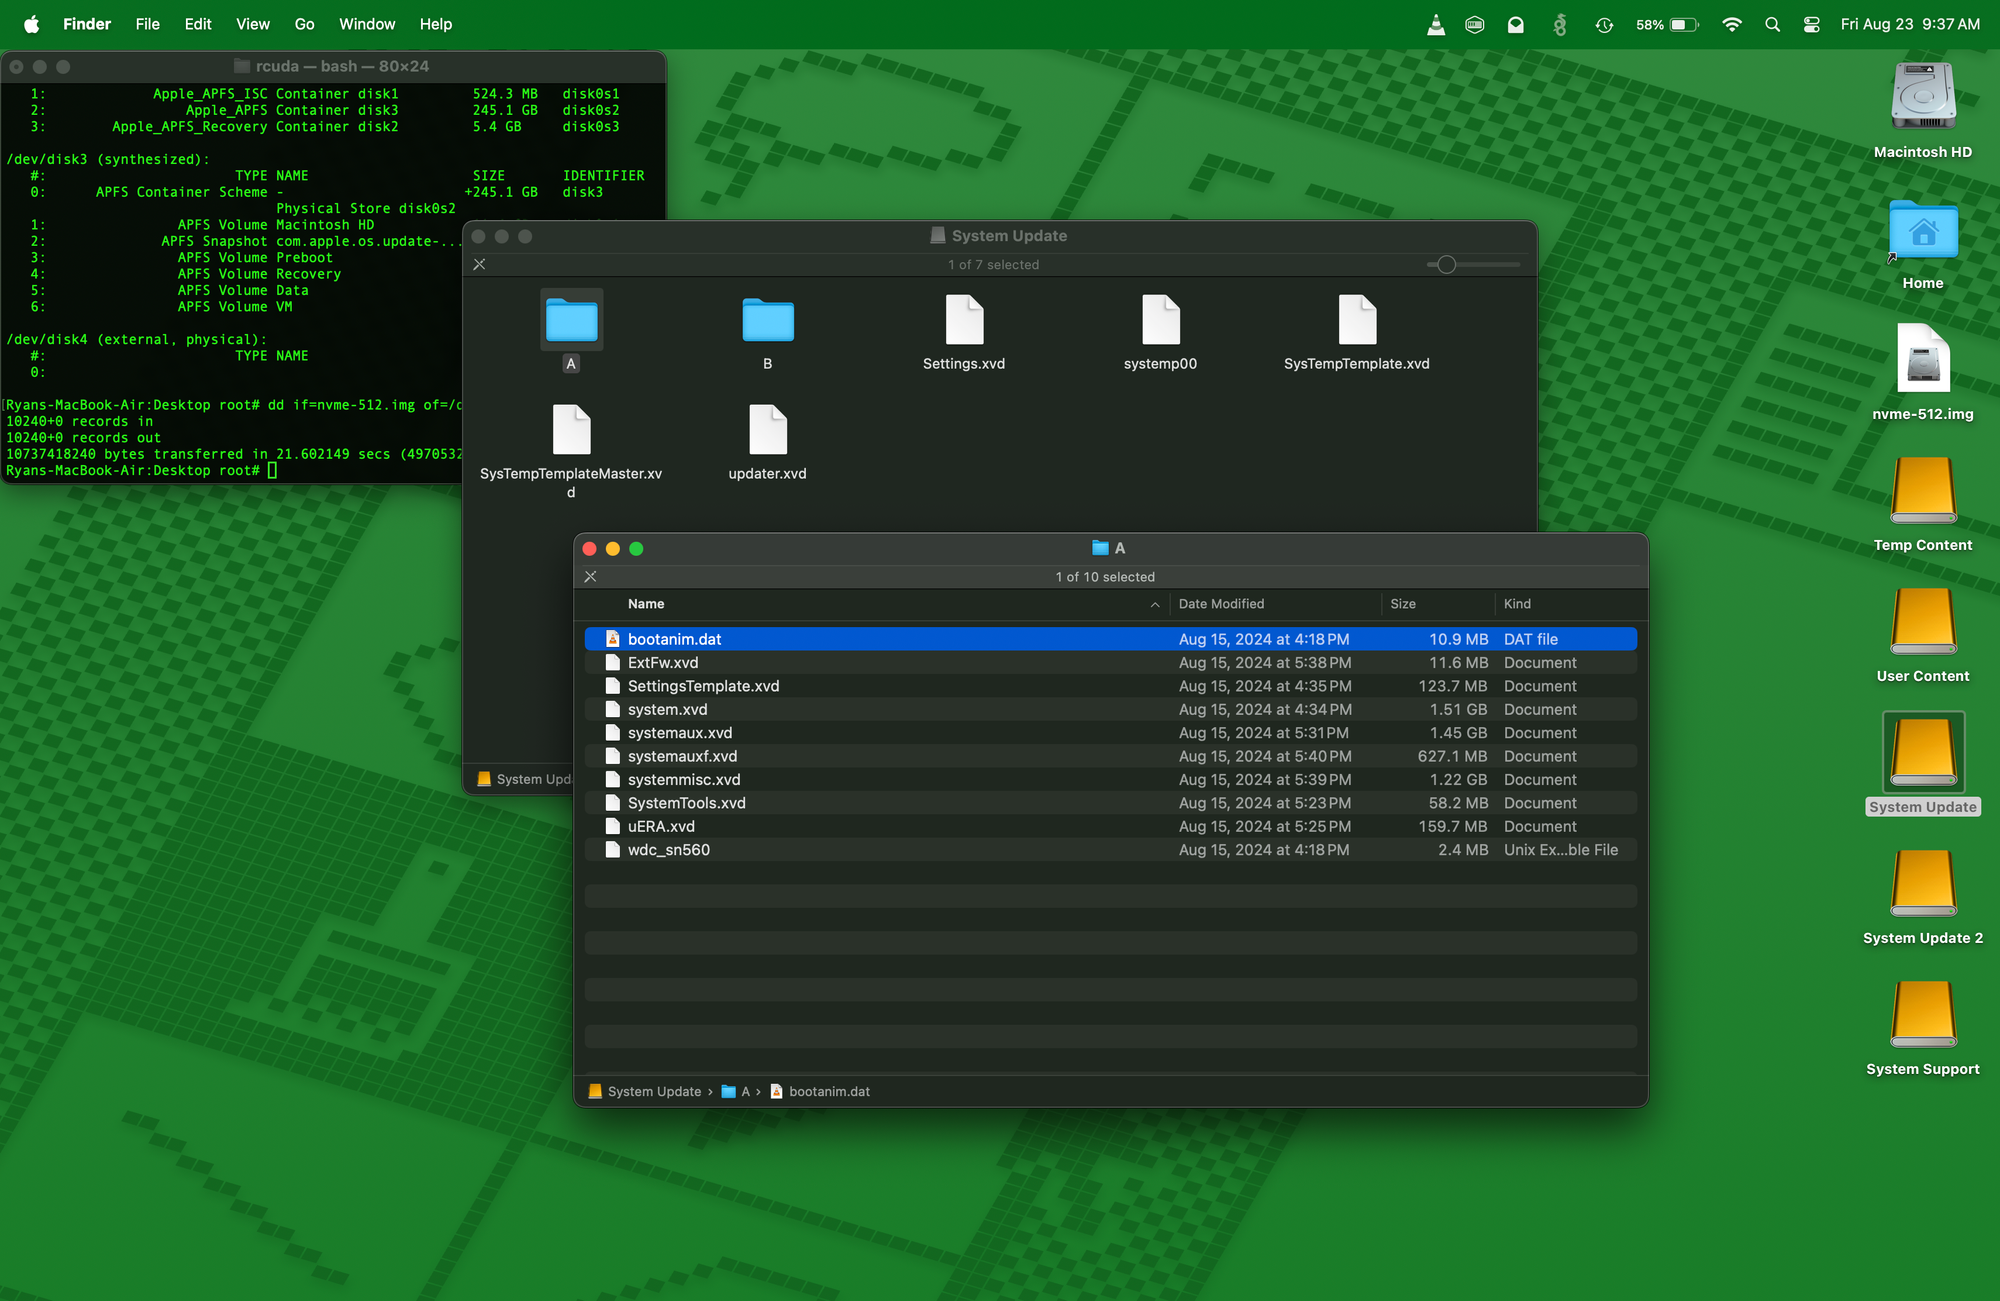
The file bootanim.dat is stored in folders A and B on the System Update partition (they're the same file, you only need one copy). Copy that file somewhere safe, as we'll need it later.
Then unmount all of the partitions on your SSD, eg;
diskutil unmount /dev/disk4s1
diskutil unmount /dev/disk4s2
diskutil unmount /dev/disk4s3
diskutil unmount /dev/disk4s4
diskutil unmount /dev/disk4s5
diskutil unmount /dev/disk4s6
You can use a command like this to back up the original disk key
# as root
# macOS example
dd if=/dev/disk4 of=/Users/rcuda/Desktop/key.img bs=1m count=10240
# Linux example
dd if=/dev/sdd of=/home/rcuda/Desktop/key.img bs=1M count=10240 --status=progress
what this does is dumps the first 10GB on the SSD to an image file called 'key.img' on my desktop. 10gb is actually overkill since the first partition is only about 1GB, but better to be safe than sorry...
Remove the original SSD from the adapter and set it aside. Maybe somewhere safe?
Step 4. clone the partial backup to the 1TB SSD
Next you're going to burn your key onto the new SSD. Quite simple, basically the opposite of backing up the key.
Install the 1TB SSD into the enclosure and plug it in. You may want to make sure to wipe it before you continue, eg;
wipefs -af /dev/sdd
Then just burn the image onto the SSD like you would an ISO to a thumb drive, eg;
# as root
# macOS example
dd if=/Users/rcuda/Desktop/key.img of=/dev/disk4 bs=1m
# Linux example
dd if=/home/rcuda/Desktop/key.img of=/dev/sdd bs=1M --status=progress
it's only 10GB and writing to NVMe so it should only take a second
Step 5. install the new 1TB SSD and partially reassemble the console
with our key now cloned onto the 1TB SSD, we can proceed with partially reassembling the console. I'd recommend just plugging the 3 daughter cards, PSU and cooling fan directly into the motherboard without the case, as once we're done flashing the firmware, we're going to need to remove the SSD again to fix the boot animation. Take a look at this photo if you need help understanding what I mean
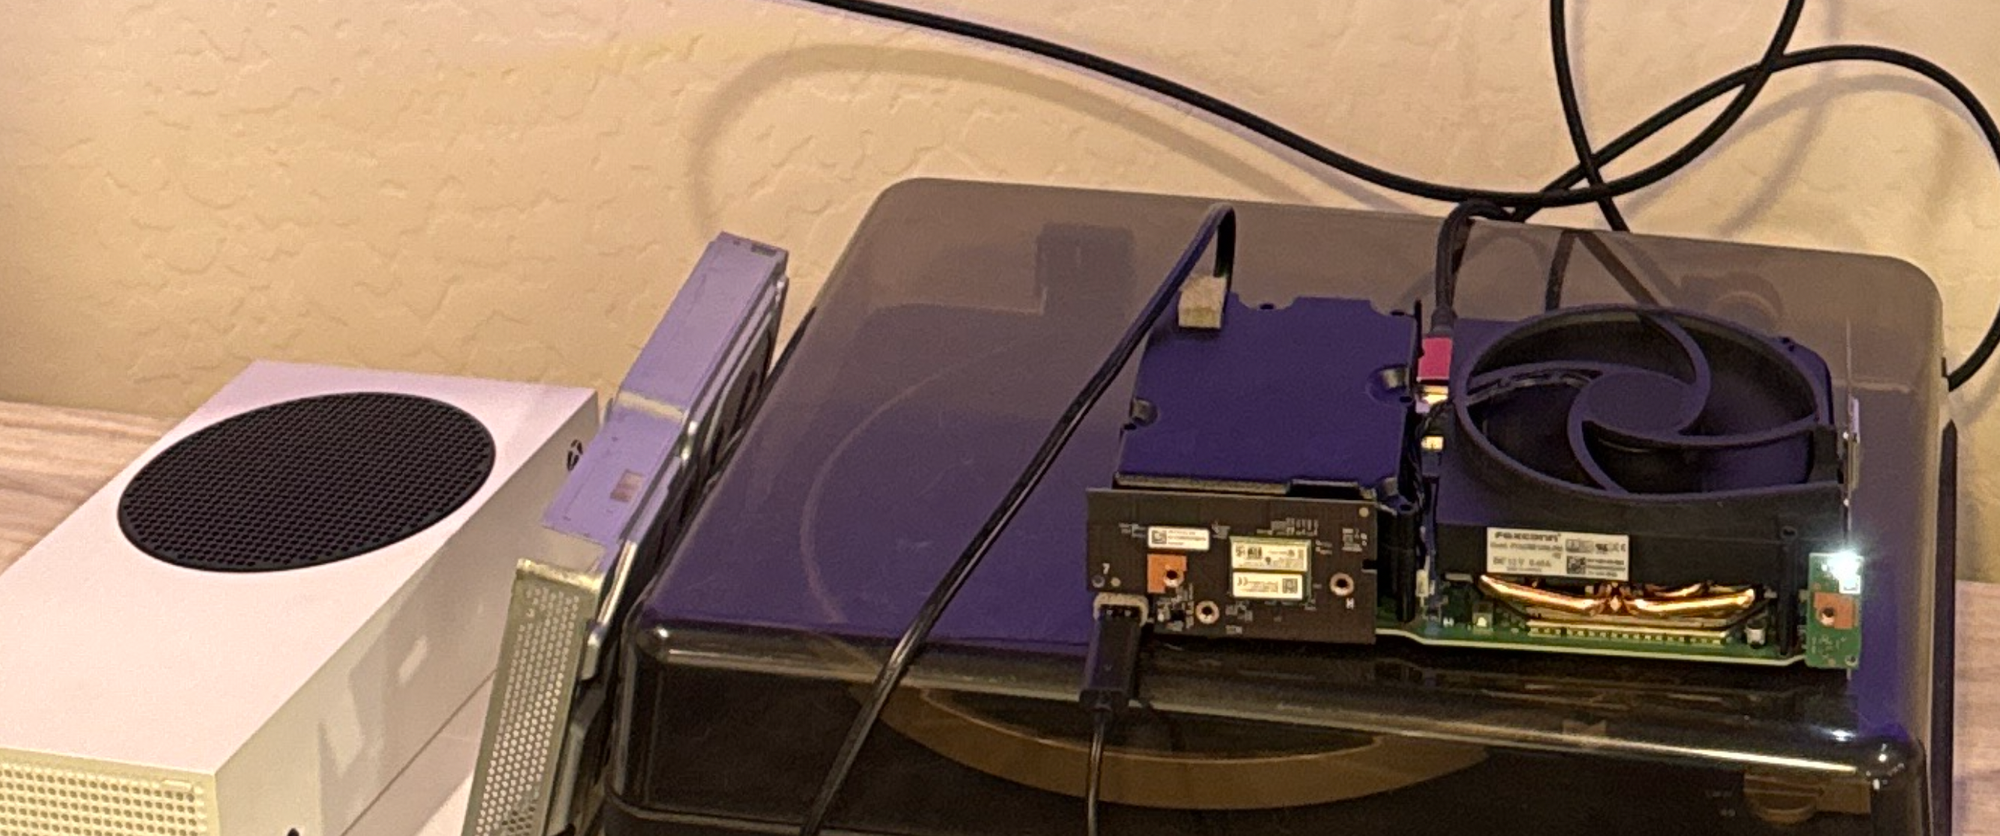
Or just follow the instructions on iFixit https://www.ifixit.com/Guide/Xbox+Series+S+SSD+Card+Replacement/141304
Step 6. perform an offline update
Now, the first time I attempted this procedure, this is where I got tripped up. I plugged the power, HDMI, thumb drive (with the offline update) and a wired controller into the console and turned it on like normal, and freaked out when it immediately started trying to do an online update. At this point I had not yet been convinced that this SSD was compatible with my Xbox and planned to return it if it didn't work. I panicked, pulled the power cord out and tried turning it back on.... to a black screen. No signs of life. Crap, I think I bricked my Xbox. So I swapped the SSD back out for the original, crossed my fingers and turned it on - and it came right back up. I breathed a sigh of relief and prepared to return to seller... we all know how that story ended.
Fast forward a couple of days - now properly convinced that my 1TB SSD was in fact compatible with my Xbox, I decided to try again. I don't know if it was because I was well rested and had just had my coffee, but I realized what my mistake was the first time - I didn't follow the instructions. I re-read the instructions on how to perform an offline update on an Xbox Series S

The crucial step I'd missed was holding pair + power on startup and listening for two beeps.
A few seconds later my Xbox dropped me to the recovery mode screen, where I'd expected it to go the first time around
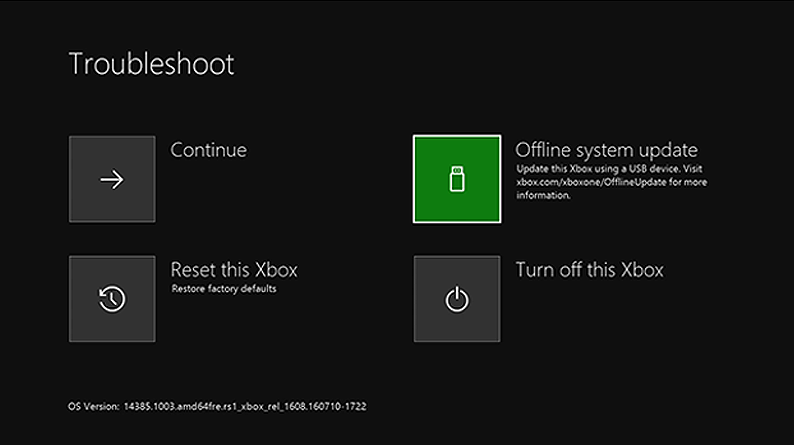
with my cheapo wired USB controller, I clicked on Offline system update and it proceeded as expected. Success!
Step 7. set the console up, verify the new capacity is detected
This part is pretty tedious and annoying. You need to go through the entire process of setting up your Xbox and logging in to your Microsoft account (assuming you have one... you'll kinda need one to use an Xbox). Once you have finished setting it all up, which takes a good 10 minutes, we can check and make sure our new SSD capacity is detected
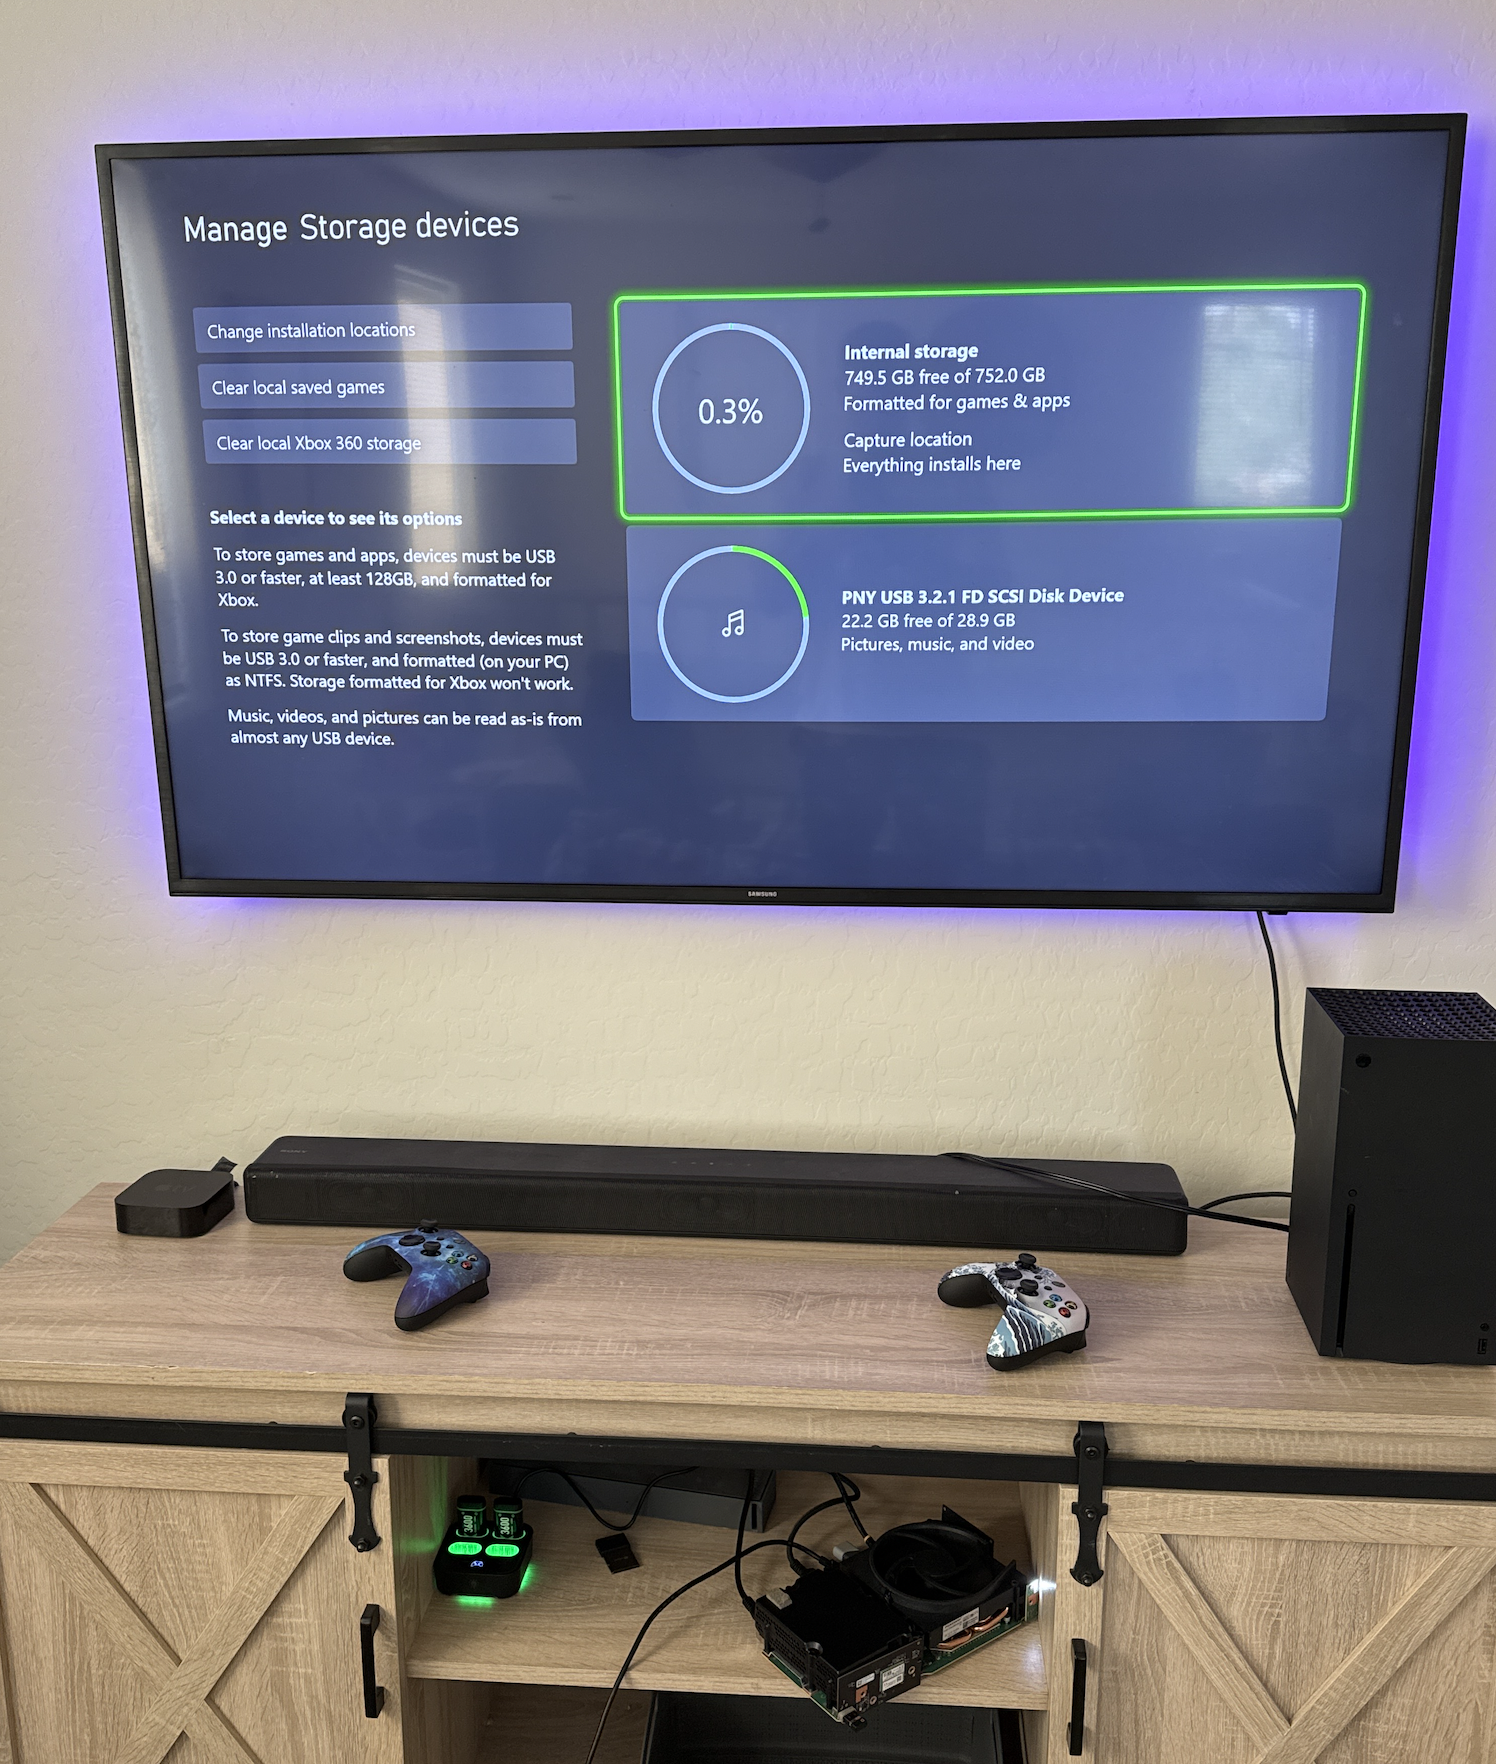
And there it is! Well... most of it, anyway (more on that in a bit). But wait, we're still not done yet.
Step 8. add the boot animation back (optional, but highly recommended)
Now we're going to add the boot animation back. For whatever reason, when you do this procedure the file bootanim.dat is lost.
Power your still naked console off, remove the SSD and pop it back into your USB adapter. Plug it in and copy the file bootanim.dat into both folder A and B in the System Update partition, and then reinstall the drive back into your Xbox.
Now when you power your console back on, you should see that sweet sweet boot animation!
Step 9. factory reset - again
Yeah... it's irritating. But the fact that I was only getting 750GB usable out of my new 1TB was even more irritating, it should be a little over 800GB free, and when space is at a premium, I wanted to squeeze every ounce of storage I could get out of it. After all, that was the entire point of this endeavor.
Go ahead and perform (yet another) factory reset. I promise, this is the last one. You can either go through the console settings menu and do it or just do it by booting into recovery mode. Either works fine.
Step 10. finally, set your console up
pretty straightforward. After you've performed a factory reset, log back in with your Microsoft account and get signed in. Then lets go ahead and check our storage.
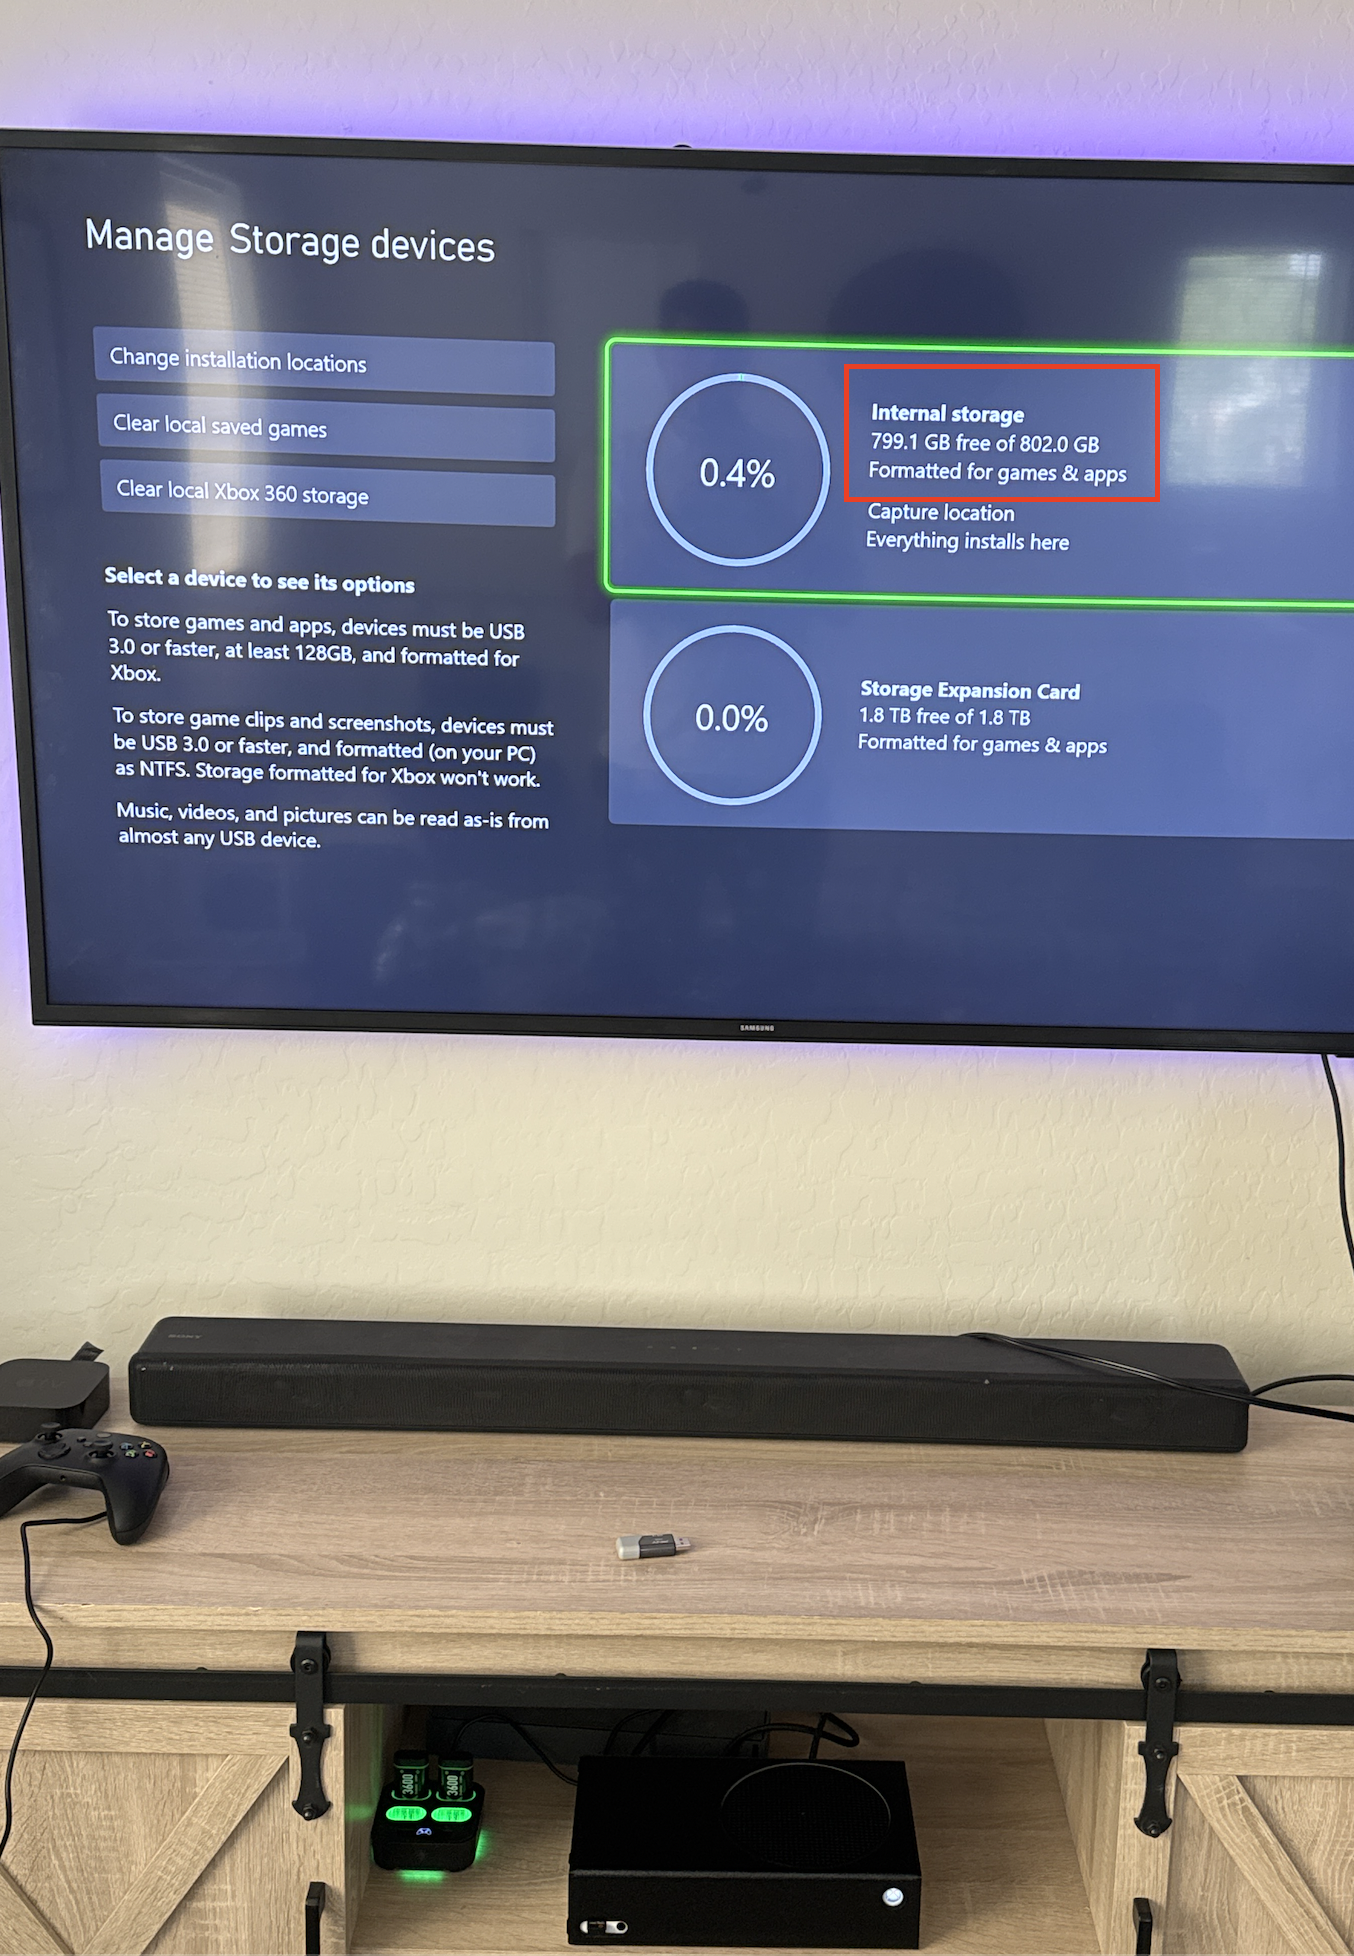
Et voila! We finally see 802GB of free space on our Xbox Series S.
Not gonna lie, this process was a complete pain in the ass. But considering I spent $100 on the console and $80 on the SSD upgrade I am calling that a huge win for right to repair and consumer rights. My free storage almost tripled from the original measly 300GB to 800GB. That puts my Xbox Series S on somewhat more equal footing against an Xbox Series X, at a fraction of the price, so was it worth it? Yeah, I'd say it was. But more importantly, now I know how to do this pretty easily to other Xboxes, and perhaps even opens the door to 2TB upgrades further down the road when some the the new special edition Series Xs start end up on eBay for parts.

